CLINK HERE FOR A COMPLETE INDEX TO ITEMS ON THIS BLOG

Tuesday, 17 November 2020

JAPANESE LEADERS and MEDIC

My first 3, Warlord games 28mm Japanese plastic figures,   painted and flocked ready for Chain of Command. 


As usual, based the figures on metal plates, modifications where carried out with the addition of the flaps on the caps, converting the puttees on one of the Leaders into boots with green stuff, added an arm band and  strap to the medic. 


Still working on my French Indian wars figures while working on the Japanese figures.

I coated the figures with black primer, completed painting the base coated the exposed flesh with Vallejo Panzer Aces Flesh base, once dry I gave the flesh areas with a wash of Agrax Earthshade.
At this stage I would normally proceed to complete the flesh areas but I decided to leave it to the last stage prior to varnishing the figures.


Rikugun-Shol (Second Lieutenant) of the Platoon with samurai sword drawn.


Gunso (Sargeant) of the Platoon.


The medic complete with bandages in his hand.


All that's needed now are troops for these leaders to command

Senior Leaders and Medic making their way thru the jungle.


Cheers John 

Sunday, 15 November 2020

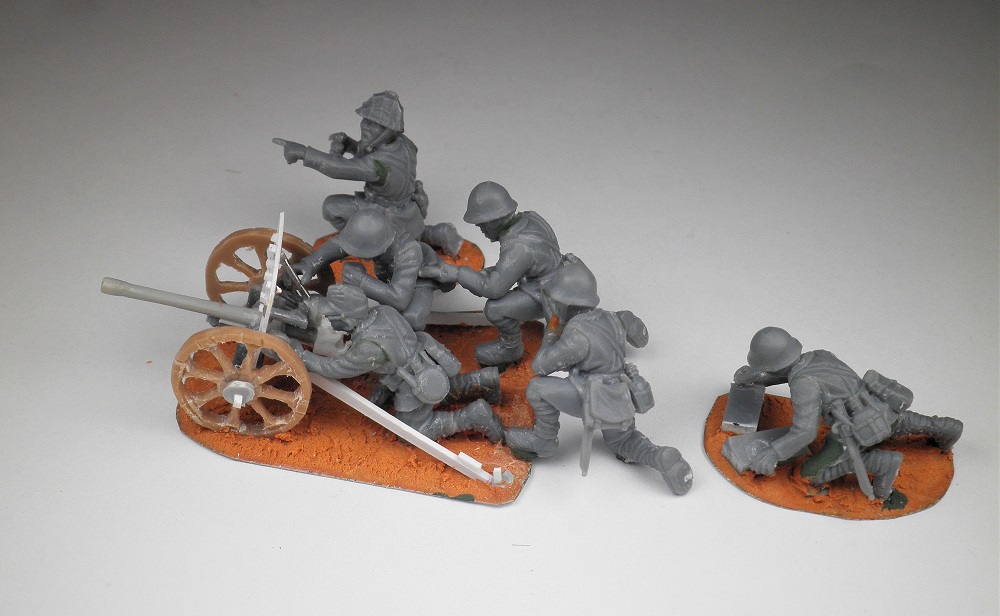
JAPANESE TYPE 94 37mm ANTI-TANK GUN -Part 1

I mentioned in a previous post, of great treasures, that can be found at the MOAB bring and buy store held every year here in Sydney, I was able to pick up Warlord games 28 mm Japanese plastic Infantry, tanks and a self propelled gun at bargain prices.

While assembling the Japanese Infantry, I was contemplating  whether to buy some support options on the upcoming Black Friday sales but since I had quite a few figure left over I decided to start scratch build some of my support instead. 

My 37 mm anti tank completed and ready for painting.


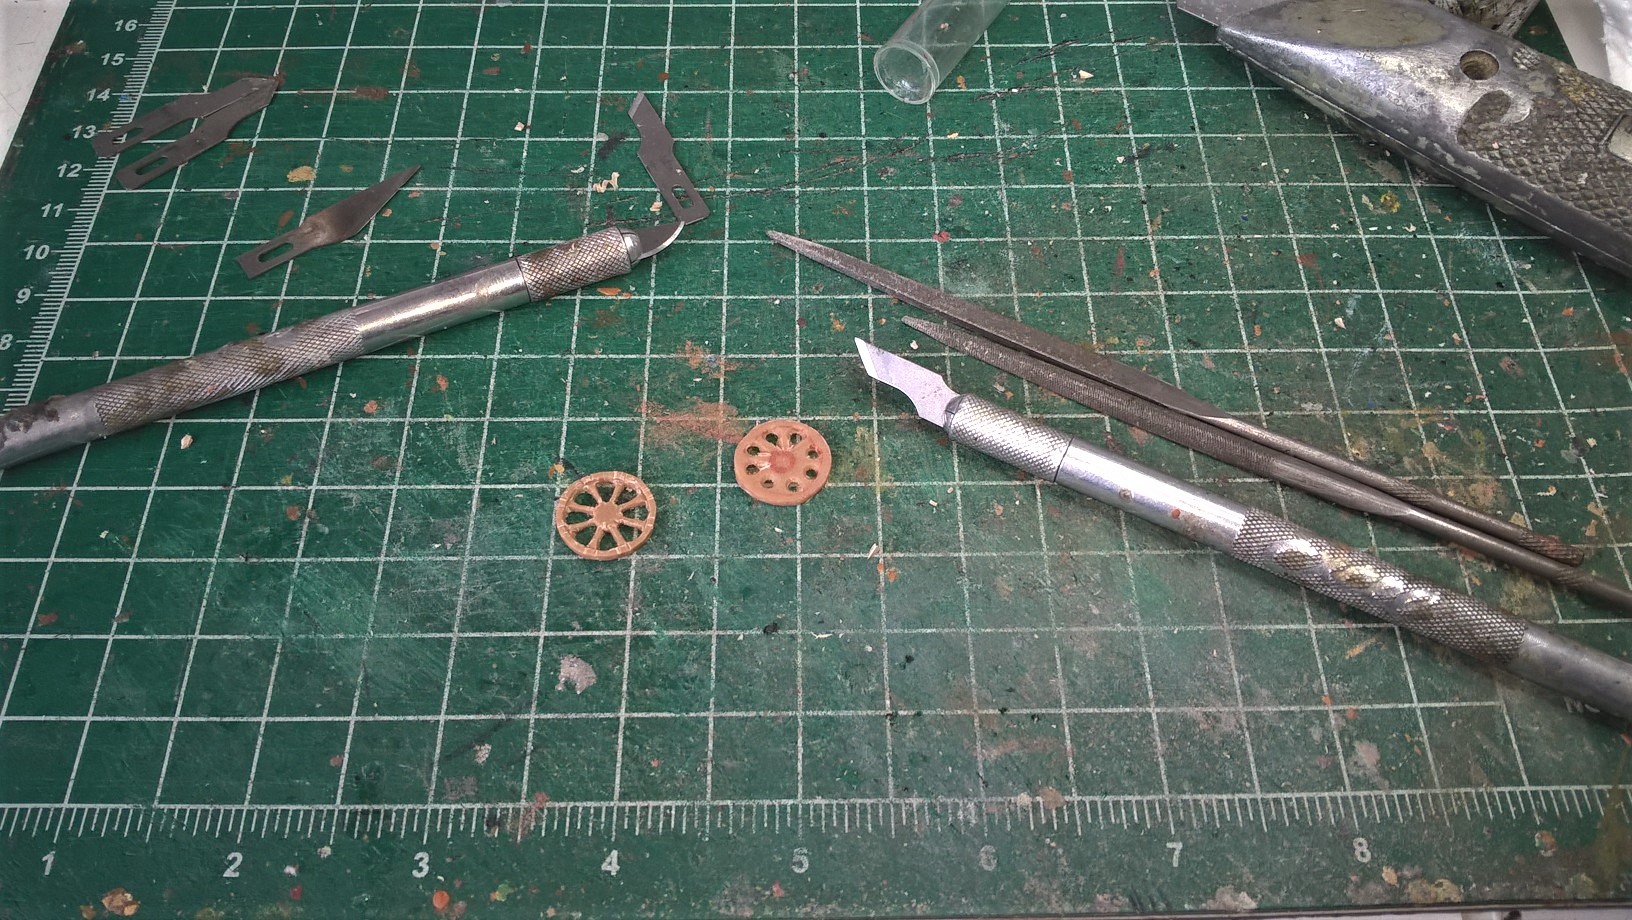
To start the scratch build, I used 2 Perry miniature plastic bases for the wheels of the gun. 
I transferred the  outline of the washer onto the plastic base using a small washer as a guide.
Next step was to cut out the outline removing small pieces with box cutters until a circular shape is formed.
Next step was to lightly sand the edge to rid the any small sharp corners. 

Next step, mark the center with the red pen, divide the base into 8 segments using 4 lines with the pen and create a circular boundary of even thickness just inside of the outer border of the base.
Use a hobby drill to create 8 small holes, then enlarge by cutting a V shape towards the inner marked circle.
Use a file to start shaping the inner portions of each hole.
 Last of all create a inner step around the inner circumference of the wheel.


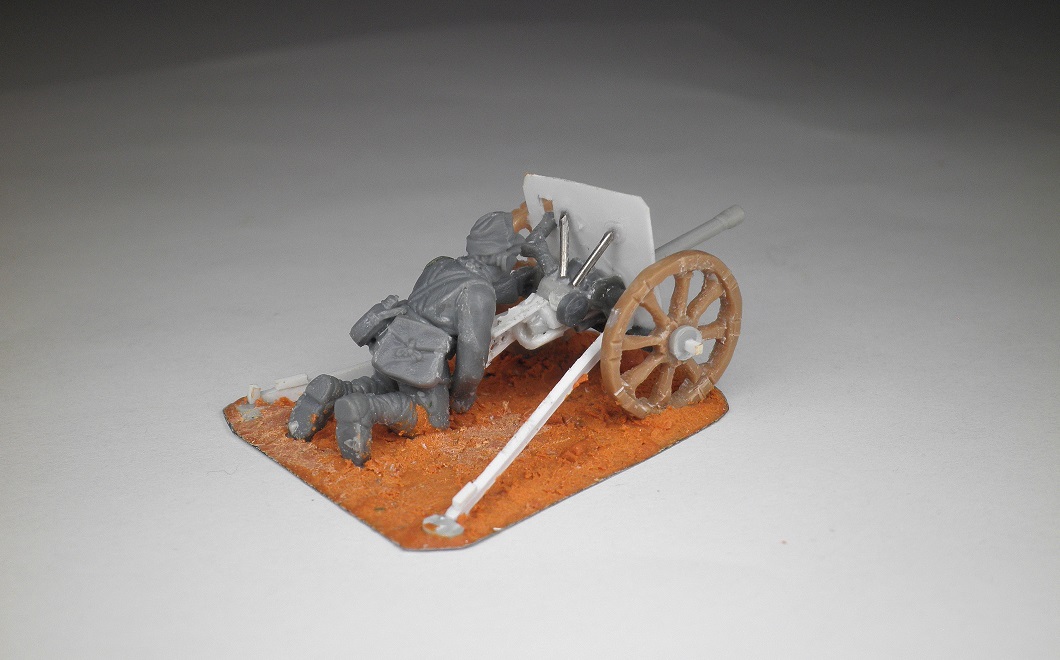
I use all sorts of bits and pieces in my junk box, to shape the barrel and carriage of the gun and secured it with super glue on a thin metal base.  

I covered the metal base with Milliput to create a textured base.
My aim was not to reproduce a perfect replica of the gun but was happy to at least be able for anyone viewing it, recognize it as 37mm Japanese anti-tank gun. 


Believe it or not I spent a couple of hours putting this together.

As most of the left over figures had standing up poses, I modified them by cutting them off at the knees and repositioning them.

The gunner is the only member that is permanently glued to the gun.


Three of the crew.

You maybe wondering why these guys have no base and are  on a large metal washer.

I decided to glue a small earth magnet on the sole of one foot this will help anchor the figures to the base of the gun. 
I have used magnets many times before to anchor figures to bases.

View of the figures with magnets positioned on the gun base.

As they suffer casualties, the figures can be removed.


The other two members of the gun consist of a Junior Leader and another crew man both had to be modified from a standing pose.


Cheers John 

Saturday, 7 November 2020

JAPANESE JUMP OFF POINTS

In between working on my French Indian War figures, I could not help myself and picked up another project that was on the back burner, my Japanese Platoon. 

First port of call was to construct some Jump Off Points.

Completed Japanese JOP 


The oil drums are scratched built and superglued onto the metal base. I then used Milliput to add texture to the base.

Next step was to add and superglue all the weapons and bits of kit  from the Warlord Games plastic Japanese Infantry box.

The camo netting is actually a fabric bandage and strips of cloth for the flags, once positioned on the drums has been established, I give them a coat of superglue to harden them.

Gun straps added with the help of some Green Stuff and balsa wood used to create the boxes.


Image of the JOP in Jungle terrain.


Cheers John.


Friday, 2 October 2020

CANADIAN MILITIA - FRENCH INDIAN WARS 28mm

Continuing with more French forces, these are my Canadian Militia. 


These are actually metal 28 mm Warlord games French Marine figures (Conquest games) which I have modified to convert them into Canadian Militia.
Some of the conversions undertaken were:
  • removal of the hood 
  • shorten the  length of the tunic 
  • filled in the front lower portion of the tunic
  • trimmed off the tail of the cap and scribed in grooves onto the circumference of the cap

Undercoated  with black Primer
Start of the painting process
2 Leaders, I conducted a head swap with the figure on the left with one of the other figures in the pack.

Militia with white tunics.


Militia with light green tunics (base colour for the tunic is Vallejo Green Grey).

Militia with sand coloured tunics (base colour is VMC Green Ochre).
The different coloured tunics and leggings help to designate them as Militia while the same coloured caps helps to link them together as a unit.


Cheers John