CLINK HERE FOR A COMPLETE INDEX TO ITEMS ON THIS BLOG

Showing posts with label LATE WAR BRITISH VEHICLES. Show all posts

Tuesday, 14 March 2017

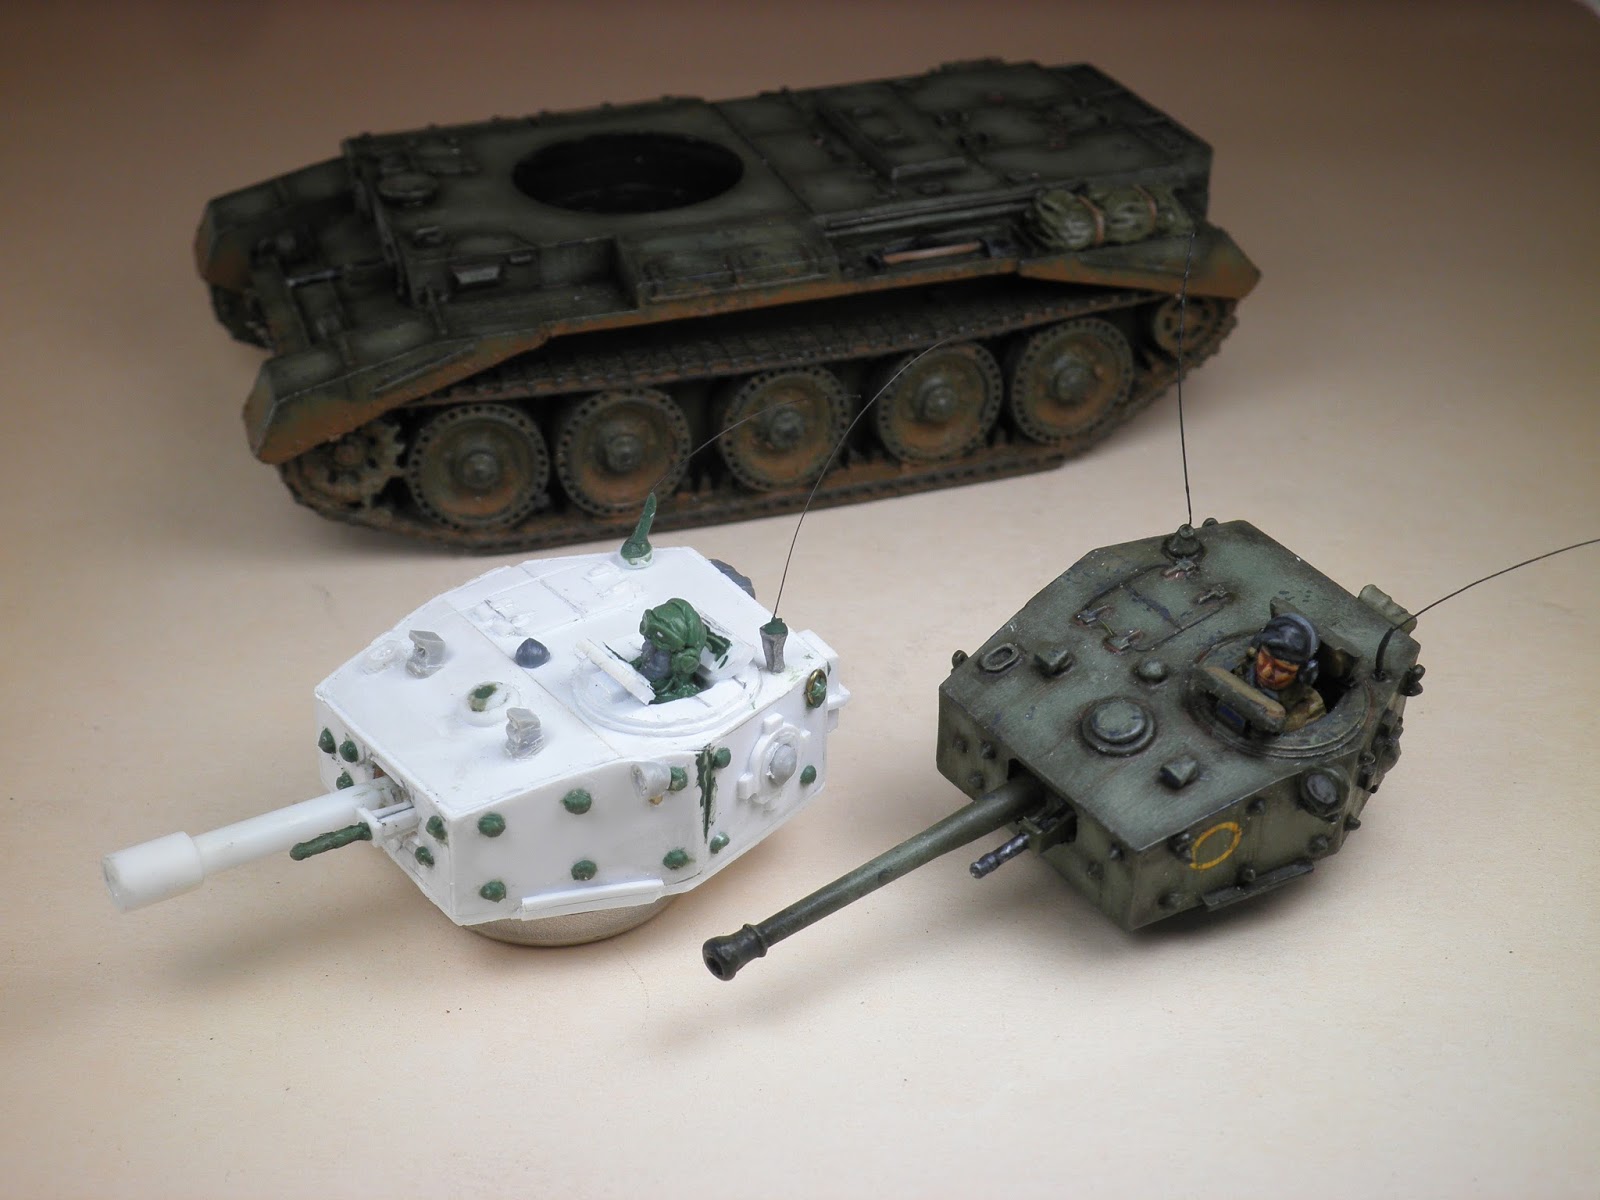
CROMWELL TANK + SCRATCH BUILT CENTAUR TURRET 28 mm


This vehicle is from Warlord games and is a resin model,I also decided to tconstruct a scratch built Centaur turret -for more info on scratch building see ARVE  Turret,Churchill Trailer and Flame Projector   - to be used interchangeably with the chassis allowing more choices from the Chain of Command Support List. 

The Centaur Turret is carved from a block of MDF and  encased with thin  sheets of plastic styrene found in hobby stores. I also used bits of plastic sprue from Infantry figures as well as brass rods and Green Stuff. The trooper in the turret is a Late war Brit,used Green stuff to sculpt a beret and head set.

So now I have both a basic Cromwell or Centaur turret ready to match up with the chassis.

.

CROMWELL TANK


CROMWELL CENTAUR TANK


Bottom view of the turret showing the MDF encased by the plastic stryene sheets.


The Centaur does not have a hull MG, I construct a pile of  gear and netting to cover the MG. It fits over the hull MG and is a snug fit,easily removed or added when required.


Saturday, 21 May 2016

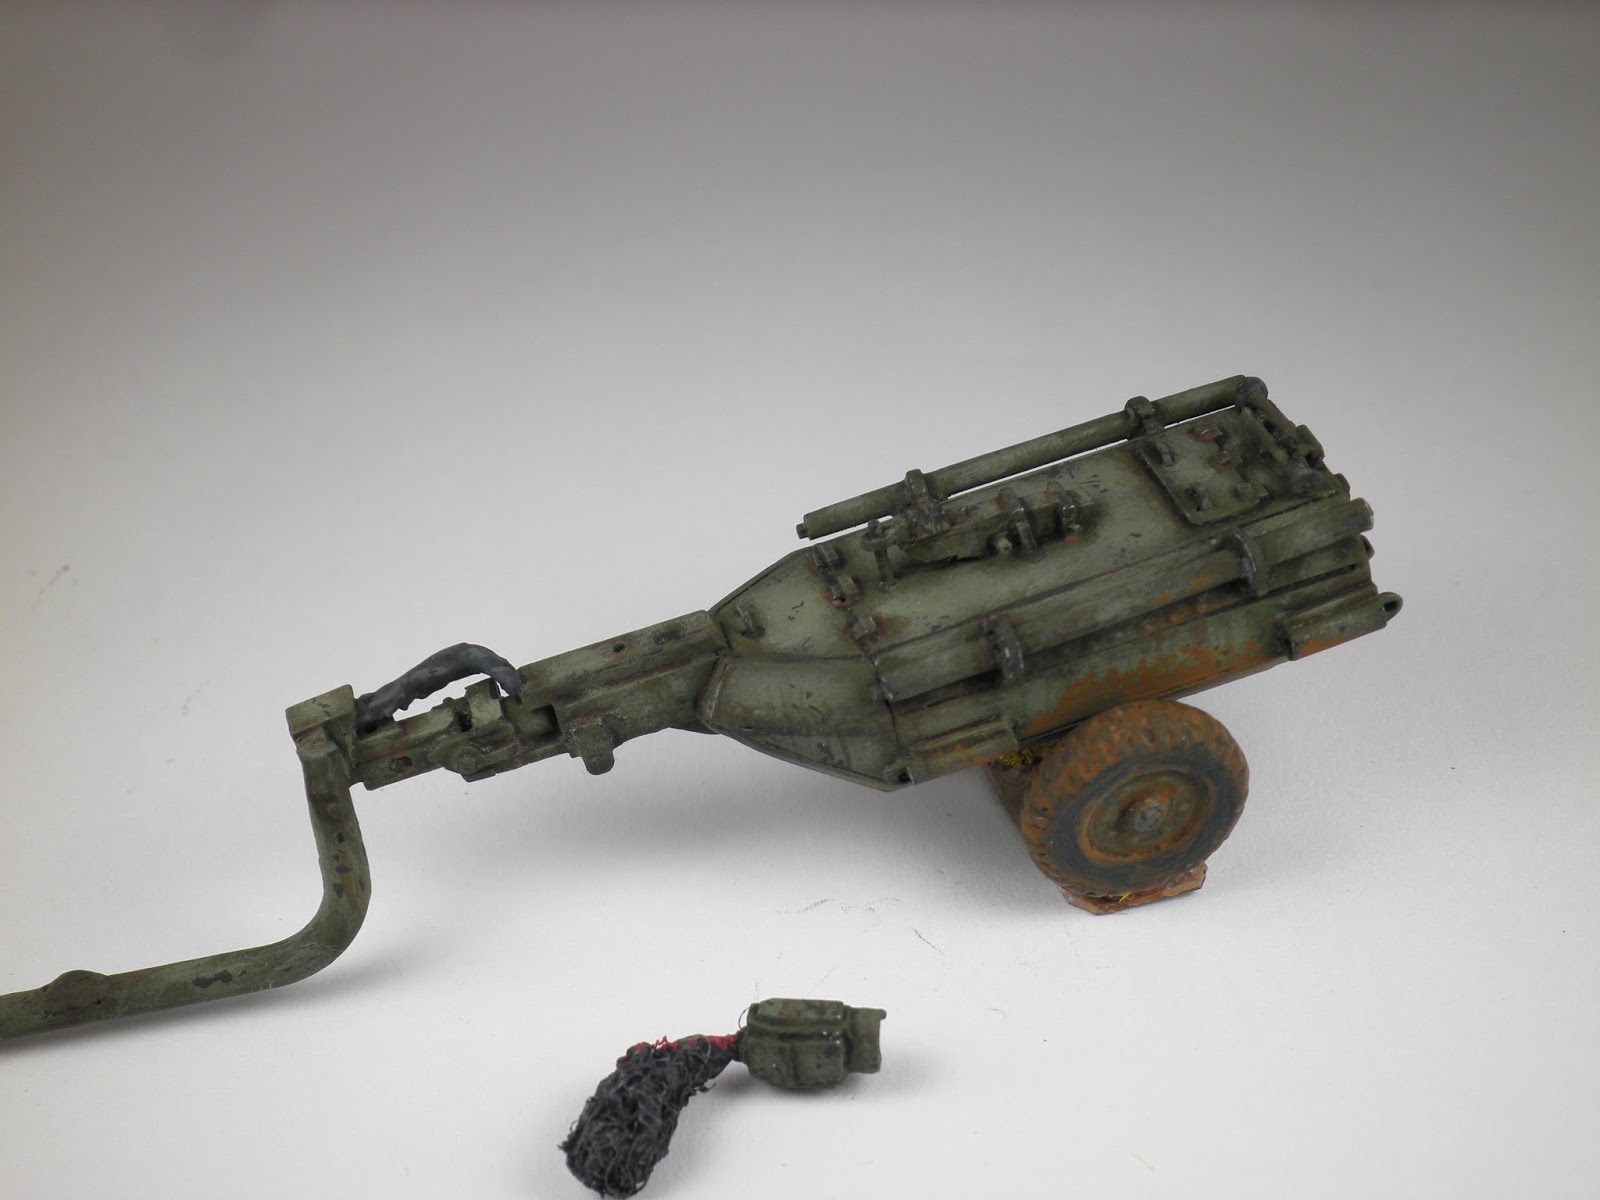
CHURCHILL CROCODILE FLAMETHROWER TANK 28mm SCRATCH BUILD TRAILER + FLAME PROJECTOR

I was hoping to post " my Infantry in foxhole project"(try to finish it next week) but instead finished my Scratch built trailer and flame thrower projector for "CYCLOPS" my Warlord games resin, Churchill MK VII.
Previously I had scratched build a ARVE turret see ARVE  from MDF, this time I continued with the construction of the trailer in MDF but I encased it with Styrene sheeting. 
Working out the dimensions and design, was challenging, as I had to rely on images found on the web.
Here is my latest addition to my Brit Support list a conversion kit to transform my Churchill into a Crocodile Flame thrower tank.
Churchill with Trailer 
Flame Projector
Completed Trailer ready for undercoat made from styrene plastic sheets,spare plastic sprues,brass rods and Green Stuff. 
Completed Flame Projector, I used polyester filler to construct the smoke see How to make a flame thrower flame and placed a tiny magnet on the base for the purpose of storage.

MDF 5mm sheets used to construct trailer.2 identical pieces where cut out and super glued together. 
measurements placed on the block.
systematically cut and filed away the designated areas and finely finished wooden trailer body.
Unlike the ARVE turret I previously constructed, I encased the wood with styrene sheets. The process involves placing super glue on the wood, placing a sheet on the glue ,allowing to dry and then scribe the plastic with a hobby knife and clip off the excess.
Completed encased trailer.
For the wheels I cut 2 circles from MDF build up one side with plastic odds and ends and finally used Green Stuff to form the tyres and wheel nuts.
Wheels attached with a plastic sprue from a left over Infantry kit. I also attached a sprue to the front of the trailer as an anchoring point for the trailer.
Undercoated with Flat black Enamel paint.
Completed paint work
On the underside of the tank I used a hobby drill to create 2 holes and glued 2 magnets in place.
The magnets on the tank will serve as anchoring points for the trailer arm which also has 2 magnets attached with an additional magnet placed at the end of the trailer arm to assist in storage.
Image showing the attached trailer to the underside of the tank. This arm in reality ran further along the underside of tank and came up thru the floor where the flame projector was located. The flame projector was located where the hull MG would normally be positioned. 

Added a tarp on top of the trailer for a bit of contrast.


First imagine shows the hull MG, the second the Flame projector in position mounted over and encasing the MG.
The Flame projector fits snugly and easily comes off/on over the MG..............."Need a light"....... Mmm ..maybe not!

Friday, 13 May 2016

HALF TRACK 28mm

Latest addition, a Half Track plastic kit from Warlords Games, fits nicely together and comes with a metal American driver. 
The British used the M5 and M5A1 versions of the half track.
Unfortunately I thought I had the M5, but I wrongly purchased the M3 plastic kit rather that the M5 from Warlord games.
Thanks to a couple of guys on the Chain of Command Face book site who pointed this out to me, so I am currently making some superficial mods by trimming back the front mud guards to help it pass for a M5 see last photo.
This link is a very helpful site:
look under United Kingdom and USA halftracks

I choose to model  the vehicle without the  Machine Gun ring as  per: http://armorama.com/modules.php?op=modload&name=SquawkBox&file=index&req=viewtopic&topic_id=230948
The only items I added to the model are the back packs hanging off the sides, I also continued with the wet mud look as opposed to dry.


The supplied American driver was modified to look more like a British infantry man with replacement of his head with a spare from the Vickers machine gun team and the addition of British webbing.
The standing infantry man is plastic from the Brit Infantry set. I modified his arms to fit both MG s.
Both figures have earth magnets on the base of the figures .
The 50 cal and 30 cal machine guns are mounted on thin cut down nails with magnets glued on the bottom and sealed with Green Stuff.
Circle indicate where magnets have been embedded in the seat and the floor of the half track and sealed with Green Stuff. 


Half track with 30 cal MG
Half track with 50 cal MG
Trimmed away the the mud guards to help make it look more like a M5.


Sunday, 1 May 2016

STUART M5A1 TANK and WILLYS JEEP 28mm

A Stuart tank  and Willys jeep added to my British Support List.
Both are from Warlords Games and are resin models.

Correction: Thanks to Scott (from Chain of Command in Australia) who gave me a heads up on the triangular insignia which should be white not red for Armoured Recce.
  Named 'Nasty'
Undercoated with Matt Black enamel spray paint
Washers glued onto the bottom of the chassis and turret to be used in conjunction with my magnetic model holder( see Modelling and Painting Tips #1) 
Added a couple of back packs hanging off the turret,a metal cable on the chassis and camo net.


The resin model of the Jeep does not come with the driver. The driver is from a left over figure from the Universal carrier, I modified his left arm to appear to be holding the side of the jeep.
The Jeep is mounted on a magnetic base and the diver is removable.(just notice super glue residue on the wheels will need to touch  that up)
Modified the Driver to fit in the jeep and connected the driving wheel to the figure.
Small earth magnets where  in-bedded into the base of the figure and the seat.

Also added PIAT/2"mortar ammo container and rifle.
The magnets where concealed with Green stuff

Primed with undercoat