I mentioned in a previous post, of great treasures, that can be found at the MOAB bring and buy store held every year here in Sydney, I was able to pick up Warlord games 28 mm Japanese plastic Infantry, tanks and a self propelled gun at bargain prices.
While assembling the Japanese Infantry, I was contemplating whether to buy some support options on the upcoming Black Friday sales but since I had quite a few figure left over I decided to start scratch build some of my support instead.
 |
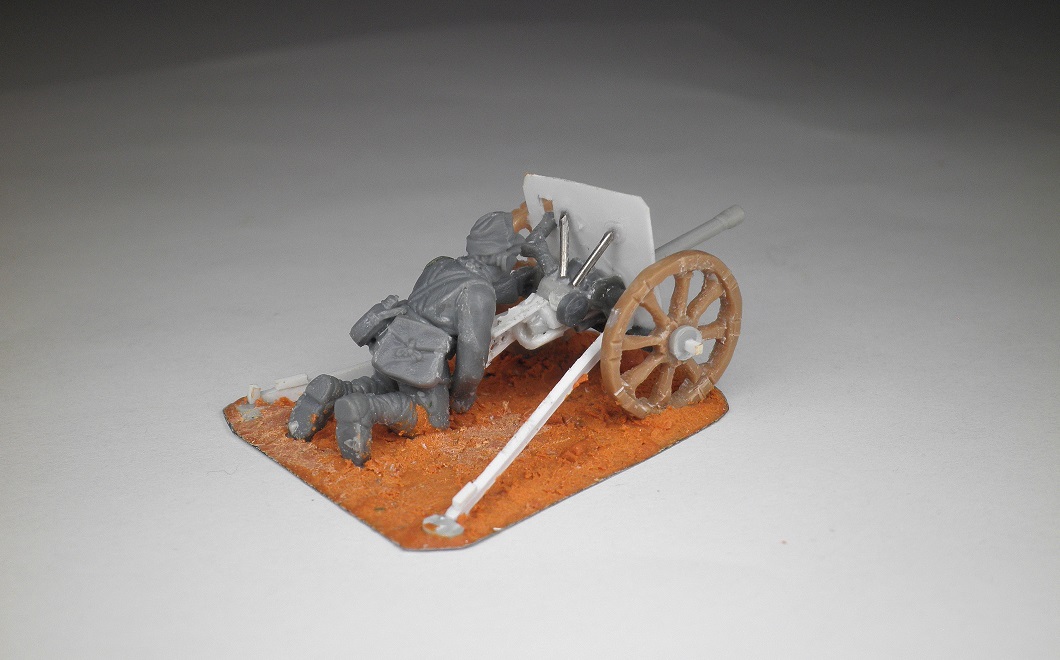
My 37 mm anti tank completed and ready for painting.
|
 |
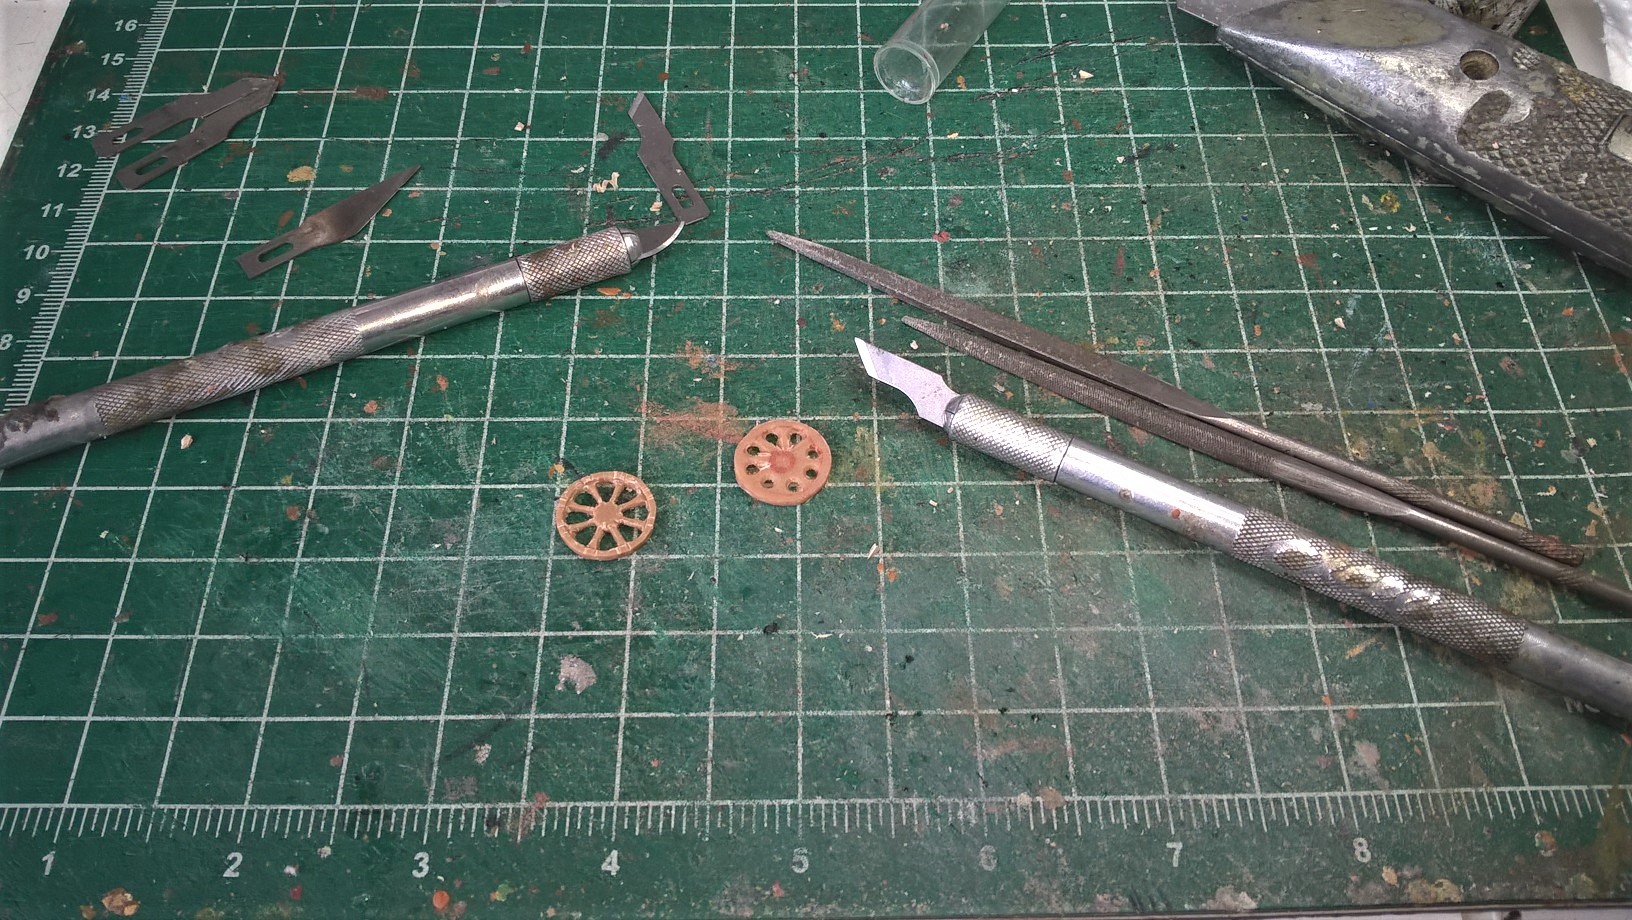
To start the scratch build, I used 2 Perry miniature plastic bases for the wheels of the gun. I transferred the outline of the washer onto the plastic base using a small washer as a guide. Next step was to cut out the outline removing small pieces with box cutters until a circular shape is formed. Next step was to lightly sand the edge to rid the any small sharp corners. |
 |
Next step, mark the center with the red pen, divide the base into 8 segments using 4 lines with the pen and create a circular boundary of even thickness just inside of the outer border of the base.
Use a hobby drill to create 8 small holes, then enlarge by cutting a V shape towards the inner marked circle.
Use a file to start shaping the inner portions of each hole.
Last of all create a inner step around the inner circumference of the wheel.
|
 |
| I use all sorts of bits and pieces in my junk box, to shape the barrel and carriage of the gun and secured it with super glue on a thin metal base. |
 |
I covered the metal base with Milliput to create a textured base.
My aim was not to reproduce a perfect replica of the gun but was happy to at least be able for anyone viewing it, recognize it as 37mm Japanese anti-tank gun.
|
 |
Believe it or not I spent a couple of hours putting this together.
|
 |
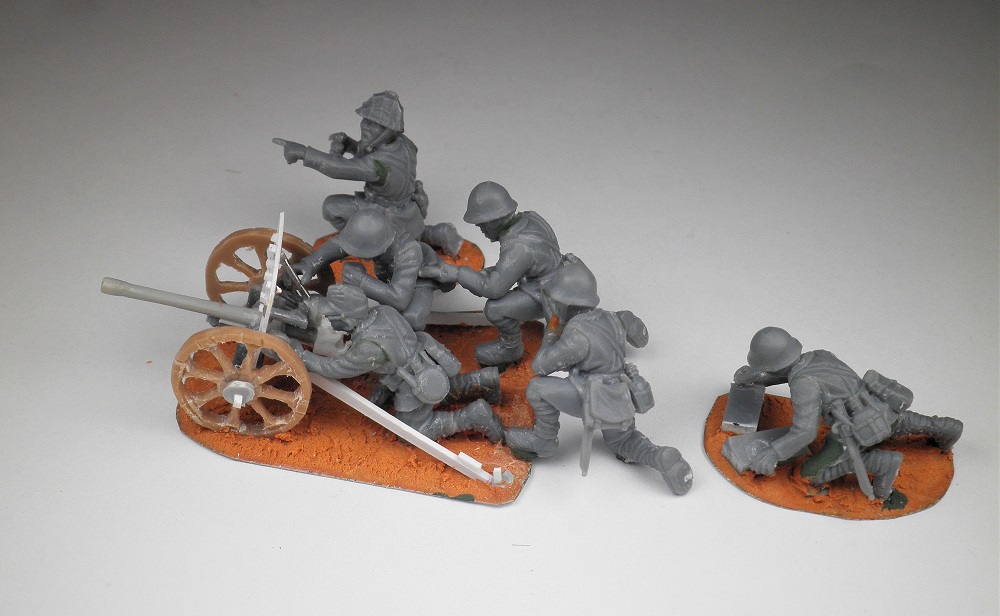
As most of the left over figures had standing up poses, I modified them by cutting them off at the knees and repositioning them.
|
 |
The gunner is the only member that is permanently glued to the gun.
|
 |
| Three of the crew. |
 |
| You maybe wondering why these guys have no base and are on a large metal washer. |
 |
I decided to glue a small earth magnet on the sole of one foot this will help anchor the figures to the base of the gun. I have used magnets many times before to anchor figures to bases. |
 |
View of the figures with magnets positioned on the gun base.
|
 |
| As they suffer casualties, the figures can be removed. |
 |
The other two members of the gun consist of a Junior Leader and another crew man both had to be modified from a standing pose.
|
Cheers John


Amazing scratch building as ever. Great work.
ReplyDeleteThank you Kym
Deletecheers John
That is a great piece of scratch building John! I'm especially impressed by the spoked wheels. I look forward to seeing this and the crews painted etc.
ReplyDeleteThanks Steve, just undercoated them, hope to start on them soon.
Deletecheers John
Lovely as ever
ReplyDeleteThank you Bradley
Deletecheers John
Keep up the great work. I keep flirting with metal figures - but always come back to Warlord plastics as they offer such fantastic conversion possibilities.
ReplyDeleteThanks Robert, yes plastics are easy to modify than metal.
Deletecheers John
That’s bloody impressive again!
ReplyDeleteThank you Nick
Deletecheers John
Good Sir, your craftsmanship and attention to detail is beyond reproach. You truly are an inspirational wargamer and terrain maker. I happened to also peruse some of your gaming tables images... and I won't look at them again for I don't want to be driven to revamping my own tabletop terrain. Hahahahaaha!
ReplyDeleteThanks Drae for your comments and I probably suffer the same, when I look at some expert painters.
Deletecheers John