Finally found some time to photograph my Woodland Indian figures, for the French Indian wars, they are from the Perry miniatures 28mm metal range (with the exception of two figures).
I have enough figures to field 3 groups of 12 Indians with an assortment of available Leaders for Sharp Practice.
It was a welcome experience painting different coloured clothing on each figures as compared to painting WW 2 uniforms.

 |
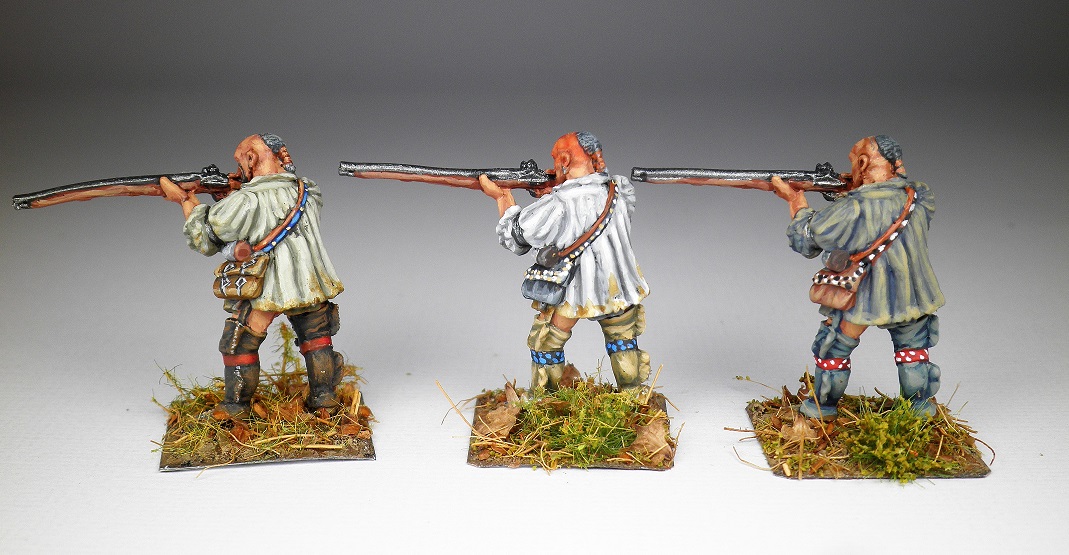
| Raiding party |
 |
| First lot of Leaders. |
 |
| Second lot of Leaders. |
 |
| Just noticed a couple of the figures still need to be flocked.😏 |
 |
The method and colours I used for the Indian skin tone was: - Vallejo Panzer Aces Flesh base 50/50 with Vallejo Game colour TAN as the base coat.
- Apply a wash with Agrax Earthshade
- Start to restore the base highlighting the muscles and avoiding the deeper crevices with the same paint mix as described in step 1.
- Continue adding Flesh Base and highlighting the model
- As you keep highlighting and adding increasing portions of the Flesh base till the original paint mix looks the same as the Flesh base colour .
- Now start highlighting by adding Vallejo Flat flesh to the Flesh base colour.
- I usually stop highlighting when I reach a stage where there is a equal mix of Flesh Base and Flat flesh.
- Up to you when you stop highlighting
- I usually do 2 figures at a time using this technique, its actually a very quick system once you get into the swing of it.
|
 |
| I also purchased six Indians with bows and arrows. |
 |
Since only 2 of figures with bows and arrows had muskets with them, I decided to fabricate another 4 muskets for the other 4 figures and glue them onto the figures. To make the muskets I used a piece of soft metal rod: - cut the desired length
- used pliers to squeeze a portion of the rod flat, this will be the back portion of the musket.
- Again using the piers I bent it down a bit.
- next step was to make the trigger, this was done again by using the pliers to squeeze a small portion of the metal rod to form the trigger
- Using the same method to make the hammer on the upper portion from the trigger.
- last step was to define the metal barrel from the wood portion of the musket this was done with the use of a sharp hobby knife to scribe a define line of the barrel
- I also drilled out the opening of the barrel as well.
|
 |
| Here are the extra muskets one glued to the base of the model, two glued to the back of the figures and the last figure's hand was modified, opening it up to clinch the musket. |
 |
| I also added some string to the bows and sealed them with super glue to make them ridge. |
CHEERS JOHN