More Support options for my BEF, Bren carriers.
Due to the lack of 28mm early war Bren carrier models out there in the wargaming market, I decide to converted two Universal carriers from Warlord games to resemble those of early war ones used by the BEF.
These plastic kits proved ideal for the task of conversion and I have included, step by step instructions on the conversion method.
 |
| Bren carriers stopping to chat with a Medic and crew of a 2 pounder in the ruins of a Belgium village. |
 |
| First step is to assemble and glue in place up to the follow as shown in the image leaving the back section of the carrier unglued. |
 |
| Image shows the back section put in place but not glued. |
 |
| The driver was glued in placed but the passenger has a small earth magnet glued to the base of the carrier. |
 |
| A small piece of metal is fixed on the underside of the figure. |
 |
Remove the back section of the bren carrier and place it aside for the time being.
Use a hobby knife to cut out the grill area as shown. |
 |
| Continuing to use the hobby knife make a diagonal cut removing a portion of the side plate of the vehicle. |
 |
| Trim off the top of the side panel till it appears as per image below. |
 |
| Now turning your attention to the other side of the vehicle. |
 |
| Make two cuts as shown and remove the side panel. |
 |
| The side panel has been removed and tidy up the cut. |
 |
| This is where you should be at, at this point. |
 |
| Grab the rear panel of the carrier. |
 |
| Using the hobby knife cut out the top portion of the rear panel as shown. |
 |
| Discard the top portion of the rear panel of the vehicle but glue in make the bottom portion of the rear panel as shown. |
 |
| Measure the cavity dimensions and cut out a piece of Evergreen plastic styrene sheet to fit and glue in place as shown below. |
 |
| Turn the vehicle around towards the rear, now we will make a rear hatch door for the trooper who will be in this compartment. |
 |
| Measurement and cut out another piece of Evergreen styrene plastic, scribe a line in the middle of the panel. |
 |
| Cut out four small squares and glue in place, these will be the hinges that allow the hatch to open and close. |
 |
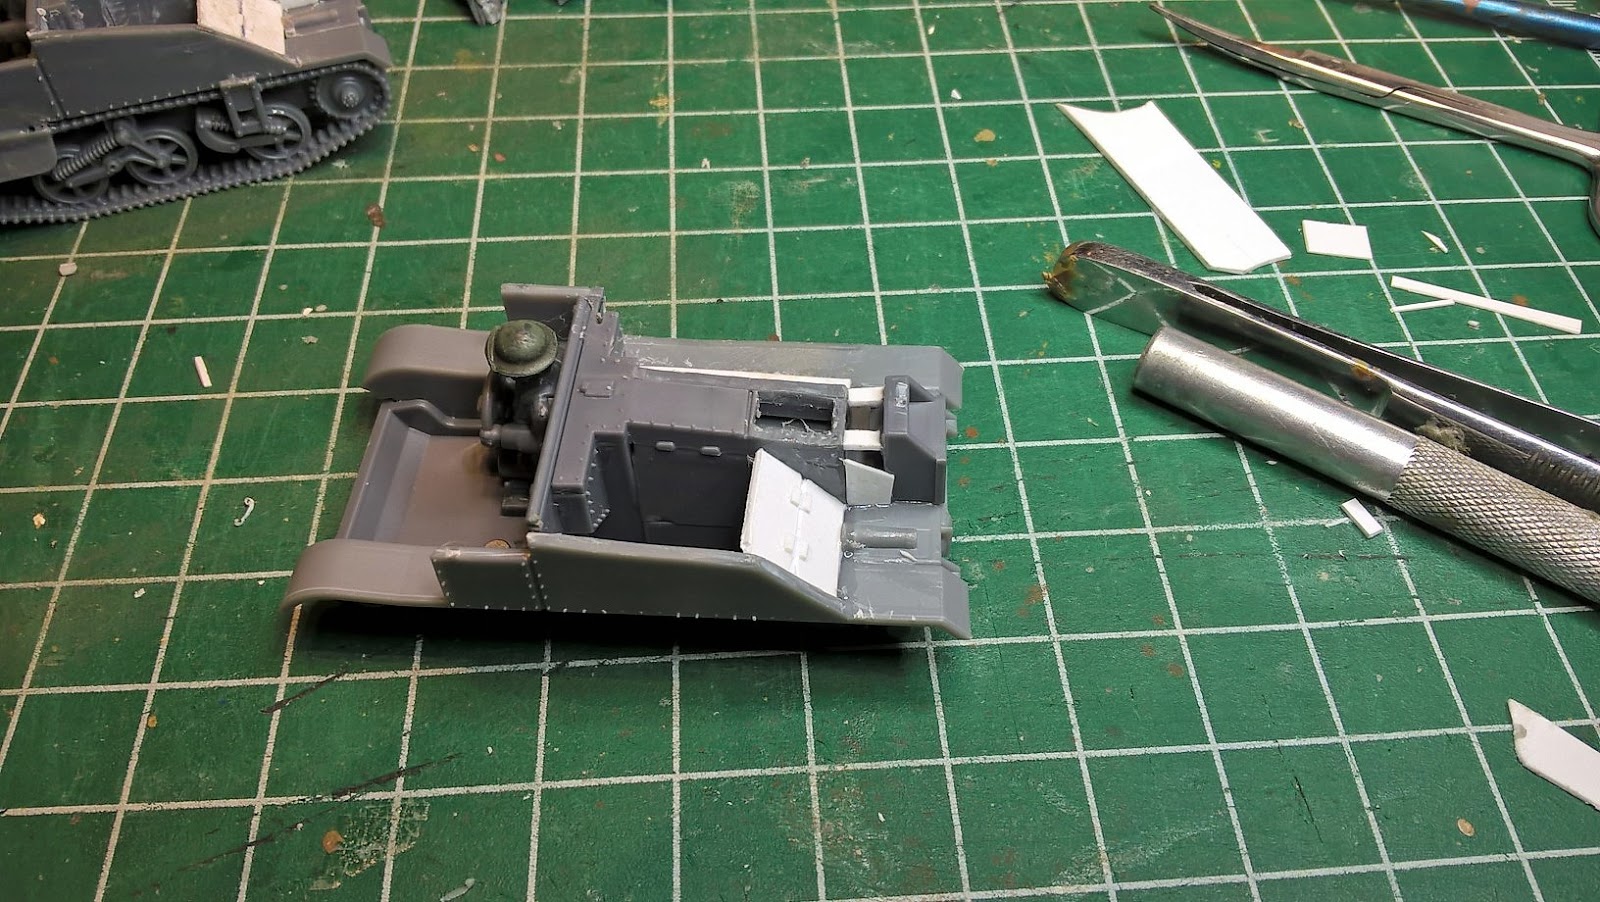
| Next step is to go back into your kit locate the piece that needs to be glued in the rear portion of the vehicle as shown. |
 |
| Cut two small portion of plastic and glue them in place between the engine housing and the piece that you just glued to the rear of the vehicle. |
 |
| Measure and cut two bits of plastic stryrene and glue in place in the lower portion of the engine housing to the rear piece as shown below. |
 |
Flip the vehicle to the other side locate this piece from the plastic kit, which is a storage container, glue it in place.
I also made a tarp from Milliput and glued it down. |
 |
| I located some round plastic sprue from another kit to carve out two fire extinguishers and glued them in place. |
 |
I drilled a hole on the top of the engine bay and glued a tiny earth magnet in place, later I sealed it with a thin layer of green stuff putty.
The magnet will help attach the ATR in place. |
 |
| I added a piece of fake jewelry chain to the front of the vehicle and this image shows the bren gun and other bits and pieces added, I also glued a piece of fake jewelry to the fronts of both vehicles. |
 |
| The ATRs are from the Perry plastic 28mm 8th army set, I glued a tiny earth magnet to one side of both guns. |
 |
| Finished Bren carrier. |
 |
I also had to cut off the heads of the figures supplied with the Universal carrier kit and replaced them with late war heads with helmets better suited for that period as opposed to the ones supplied in the kit which were late war helmets.
I also added the gas mask pouch using Milliput putty. |
 |
I decide to fix in place both Bren guns.
The ATR is placed on top of the engine bay.
My reasoning is if I decide to arm the carrier with only a Bren gun I would remove the ATR and visa versa if I wanted to field it with the ATR as the main armament I would keep the ATR in place , this would let me know it was only armed with ATR.
|
 |
Since the driver always stays with the vehicle, he is glued in place while the other figures can be removed, to indicate them disembarked or become causalities.
The two figures that are seated at the rear of the vehicle have a small piece of metal glue to the base of their shoes and a hole as been drilled on the floor of the rear compartment to house a tiny earth magnet, this keeps these guys in place. |
Cheers John


