In this post I have included a step by step tutorial for making clothes lines and hay stacks.

 |
| I made these clothes lines back in 2019 for the Chain of Command event at Cancon 2020, a 3 day event focusing on Early War encounters, unfortunately I forgot to include them in the terrain for the event. As scatter terrain adds a bit of interest on the gaming table I thought why not make some common domestic items such as clothes lines. |
 |
| BEF troops rushing thru a French yard with the forgotten washing still on the line. |
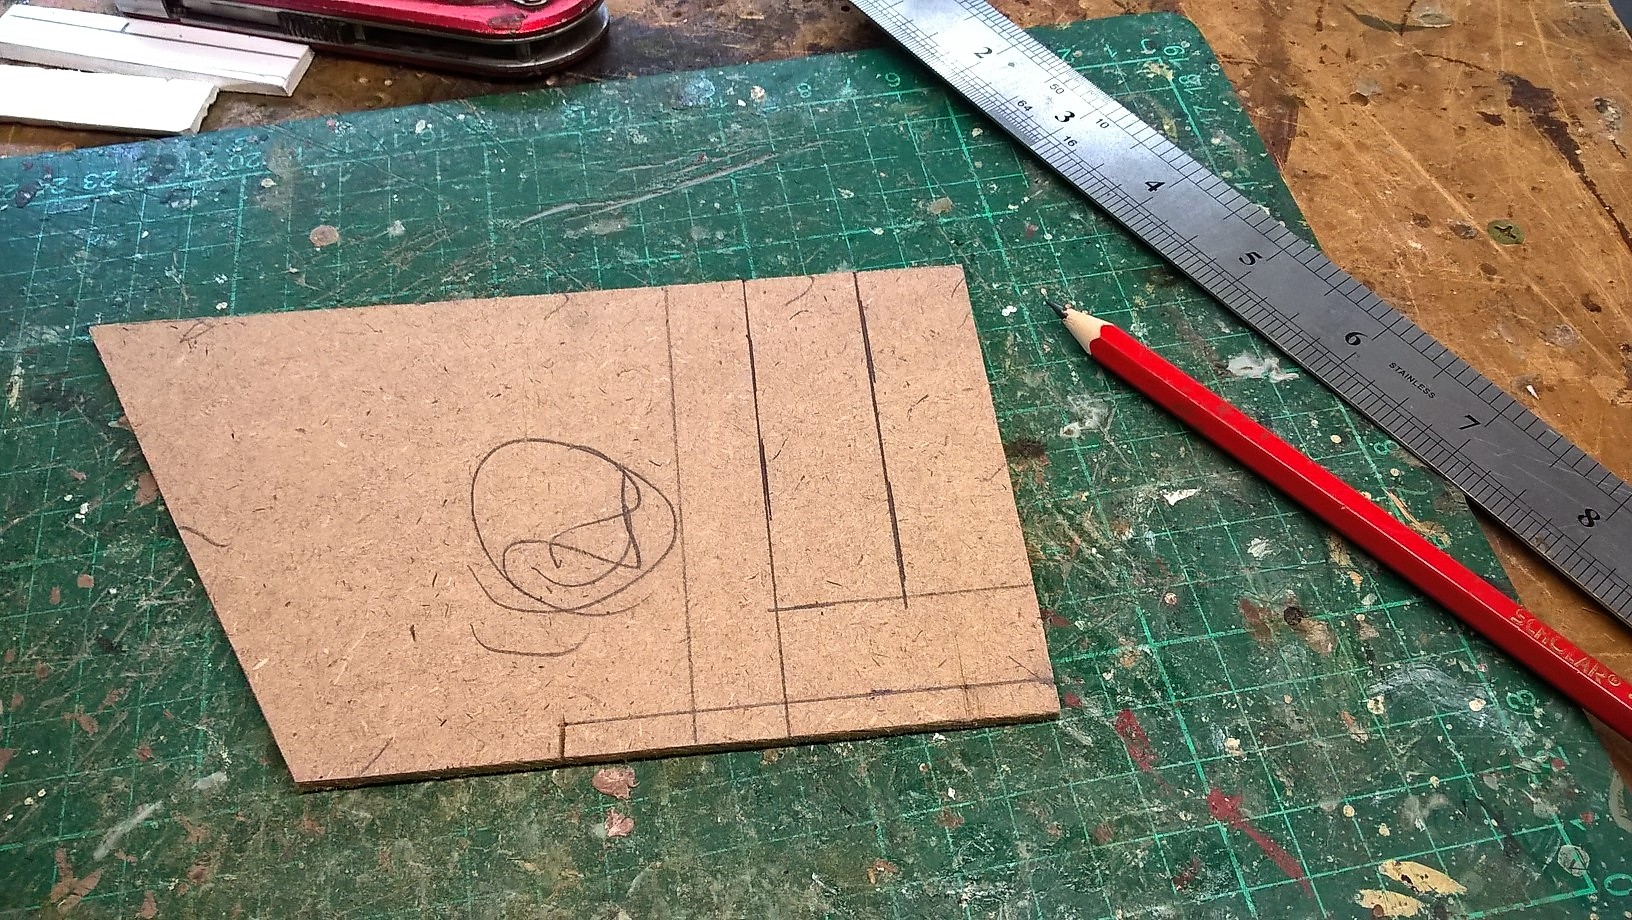 |
| Here is how I made them, first step is to use 3mm MDF for the base. |
 |
| Cut out 3 bases 9cm long and 2 cm wide. |
 |
| Chamfer the edges with a wood file. |
 |
| Prepared 6 matches 5cm long for the posts. |
 |
| Scribed the matches to create wood grains with the edge of a hobby knife. |
 |
| Drilled 2 holes matching the diameter of the matches. |
 |
| Superglued them into position. |
 |
| I raided my wife's sewing box for some thick thread and used the BEF trooper to gauge the correct height for the clothes line. . |
 |
| Tied both ends. |
 |
| I applied superglue to the knots and the on the matches to strengthen them. |
 |
| I wanted to create a bit of realism to the line as if a strong wind was blowing against the soon to be added clothes and that the clothes line appeared to bow. This was achieved by adding super glue along the thread and either leaning a instrument on top of the thread or fixing a temp line to hold it in place while the super glue cured. |
 |
| Next step, raid my wife's sewing box again for a suitable thread and needle and scavenge some bits of cloth. |
 |
| I used scissors to cut out shapes of towels and clothing. |
 |
| I used the needle with the thread to sew the cloth onto the line. |
 |
| Close up image |
 |
| Used scissors to cut the red thread but not too close to allow for a bit of thread to stick up as this will mimic the pegs. |
 |
| Drop some superglue to secure it in place and continue with the rest of the pegs this will help them stand straight up. |
 |
| Last of all place super glue on the clothing and before it starts to set use a pair of tweezers to create folds in the clothing as if blown by the wind - this step maybe a bit messy and you will get super glue on your finger tips. |
 |
| Completed clothes line, leave to dry and then proceed to undercoat them and stat the painting process. |
 |
| I forgot to include images of the clothing baskets I made from Milliput each clothes line has its own distinct basket. |
 |
| Side view showing how the clothes are responding to the wind. |
 |
| This must be a strong gust of wind as its also toppled over the clothes basket. |


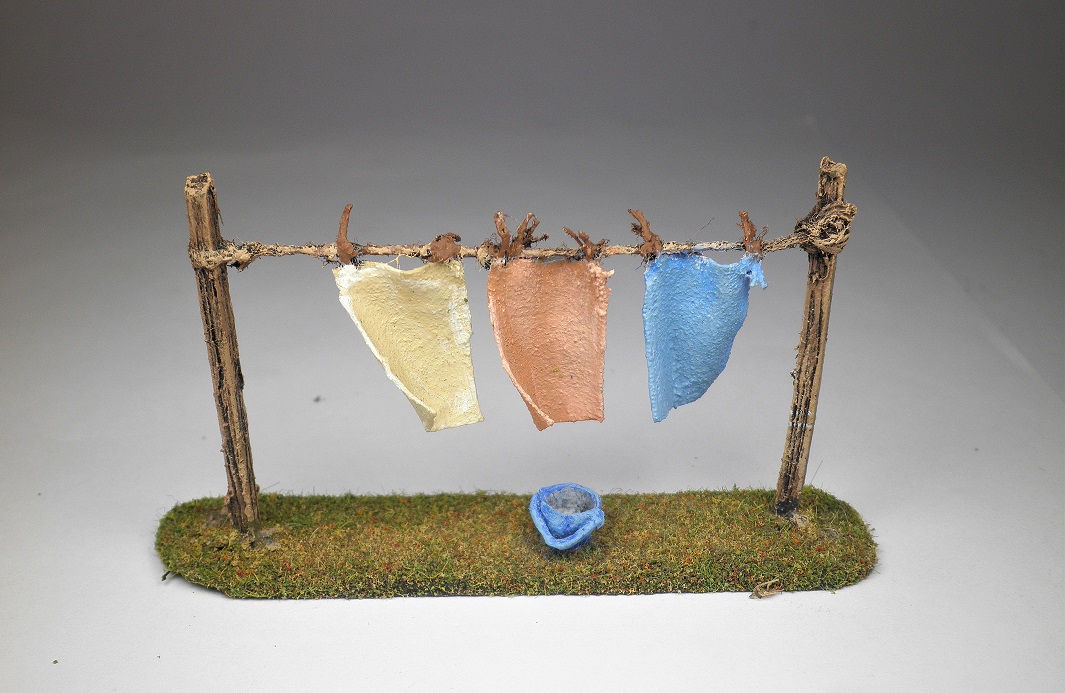 |
| I used Vallejo Model colour paints. |


HAY STACKS
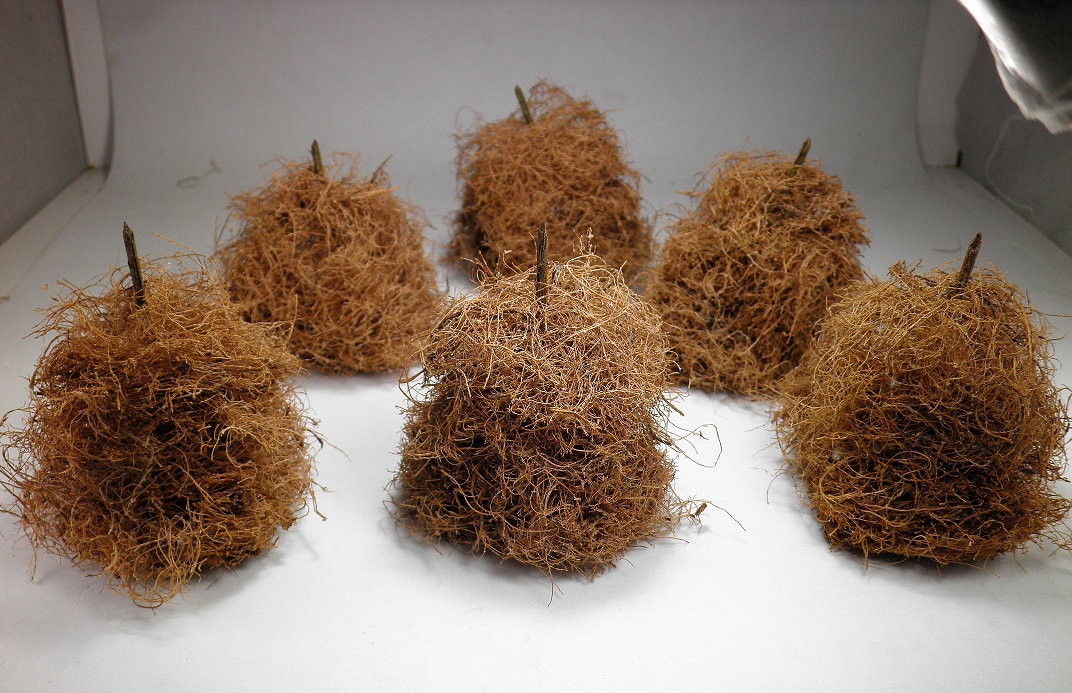 |
| I made 6 Hay stacks from Rubberized Horse hair. |
 |
| BEF troops making there way to the edge of the wheat field. |
 |
| First step is get hold of some Rubberized Horse hair and cut 6 cubes. |
 |
| Tease out the fibers with a pair of scissors. |
 |
| Image showing the teasing out of the fibers. |
 |
| View of the base trimmed to create a circular base. |
 |
| Carefully remove fibers from the top portion of the stack to create a tapper. |
 |
| Use scissors to help with this process. |
 |
| It should look something like this. |
 |
| This is a optional step I carefully opened the stack towards the base and inserted a lead sinker from my fishing gear and resealed it together with hot glue gun. I did this to give the hay stack some stability. |
 |
| Hay stack ready for the next step. |
 |
| Prep some toothpicks by creating texture in the top portion of the toothpick. |
 |
| Paint them. |
 |
| Insert the toothpick and secure in place with some glue from a hot glue gun. |
 |
| BEF trooper next to the Hay stack. |

 |
| A gaming table with 3 Hay stacks located in the recently harvested wheat fields. |
Cheers John


