This was a spur of the moment project I did, this long weekend, I woke up in the morning with a crazy idea that I needed to build some guards for my Germans even thought I was already working away on my US Marines.
I had been working on my US Marines for a while and sometimes, its good to work on another project in between, to get the inspirational juices going again.
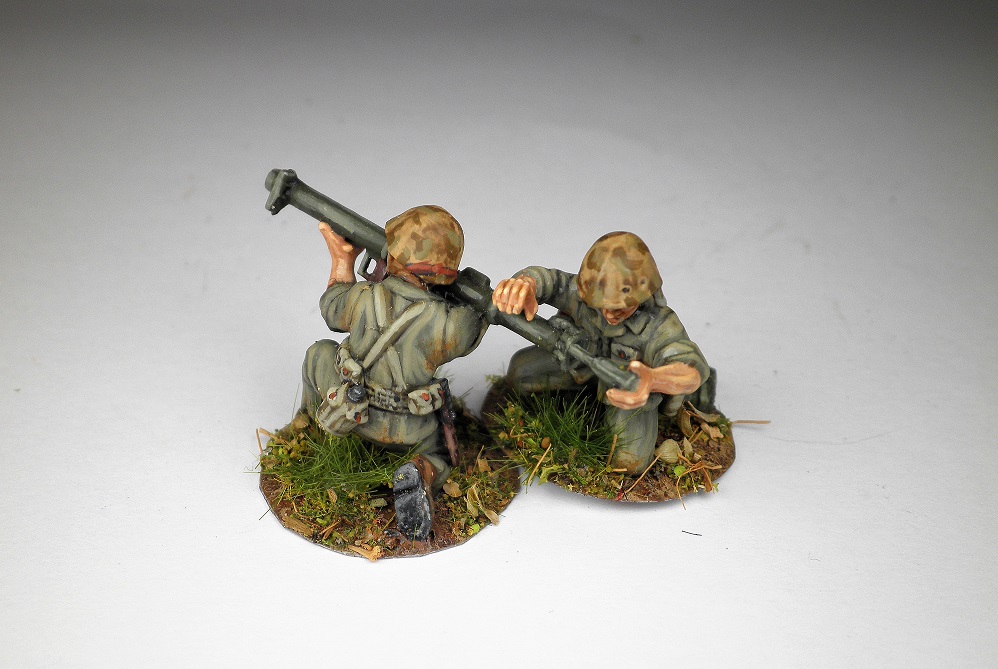
I raided my left over parts bin and selected four Warlord games plastic German torsos and proceeded converting their body parts into a guard like posture.
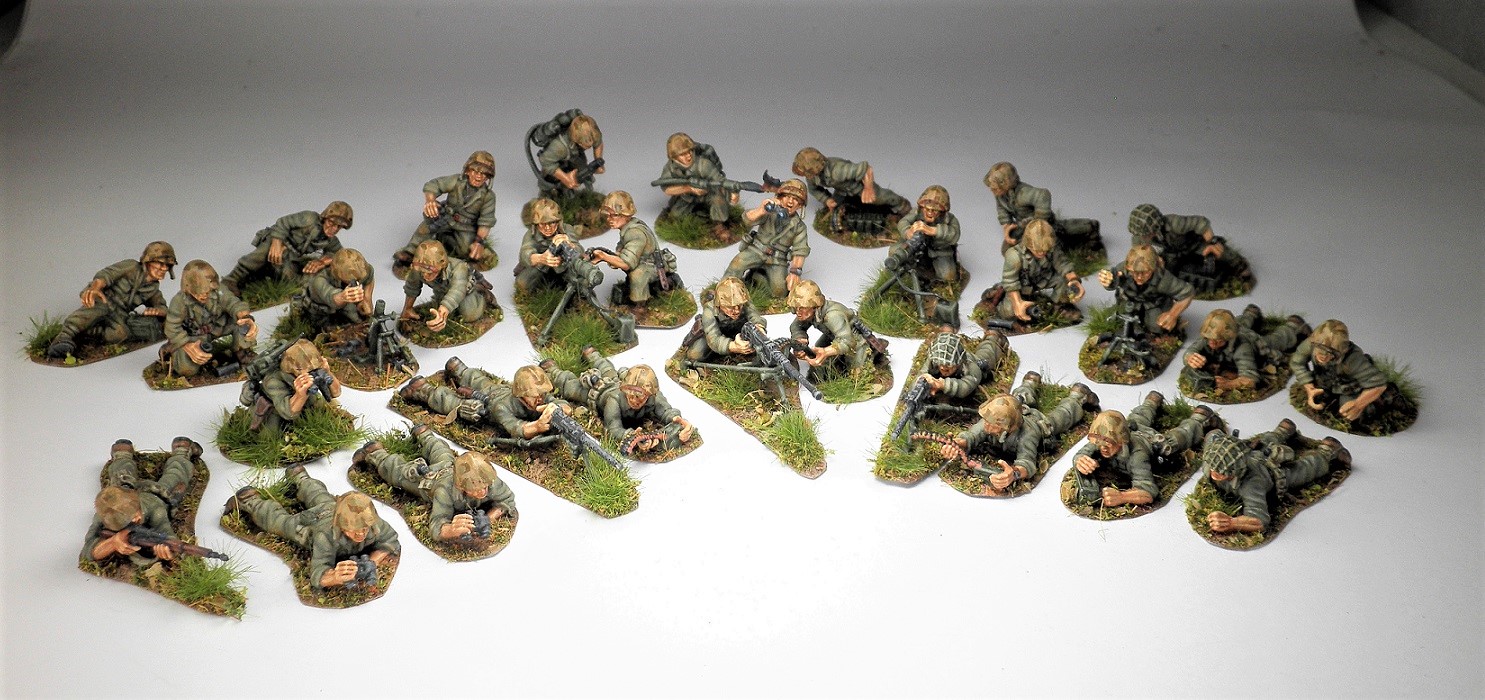
These troopers will be utilised for specific Chain of Command scenarios, such as the ones found in the TooFatLardies specials.
I also included a painting guide for Late war German Infantry.
 |
 |
| Completed conversions figures ready for priming. |
 |
| Both of these figures had their right arms sliced in a couple of area to reposition them grasping the rifle and the base of the right figure was trimmed at the base connection to the shoulder and Green stuff putty added. Rifle straps were added with Milliput. |
 |
| Back view of the figures show how the right legs with sliced and repositioned with the help of some Green stuff putty. |
 |
| These two figures had some adjustments to the area which connects the arm to the shoulder and again Green stuff putty used to remodel the shoulder area. |
 |
| The right figure also had his right legs sliced and repositioned. |
 |
| Primed Black |
 |
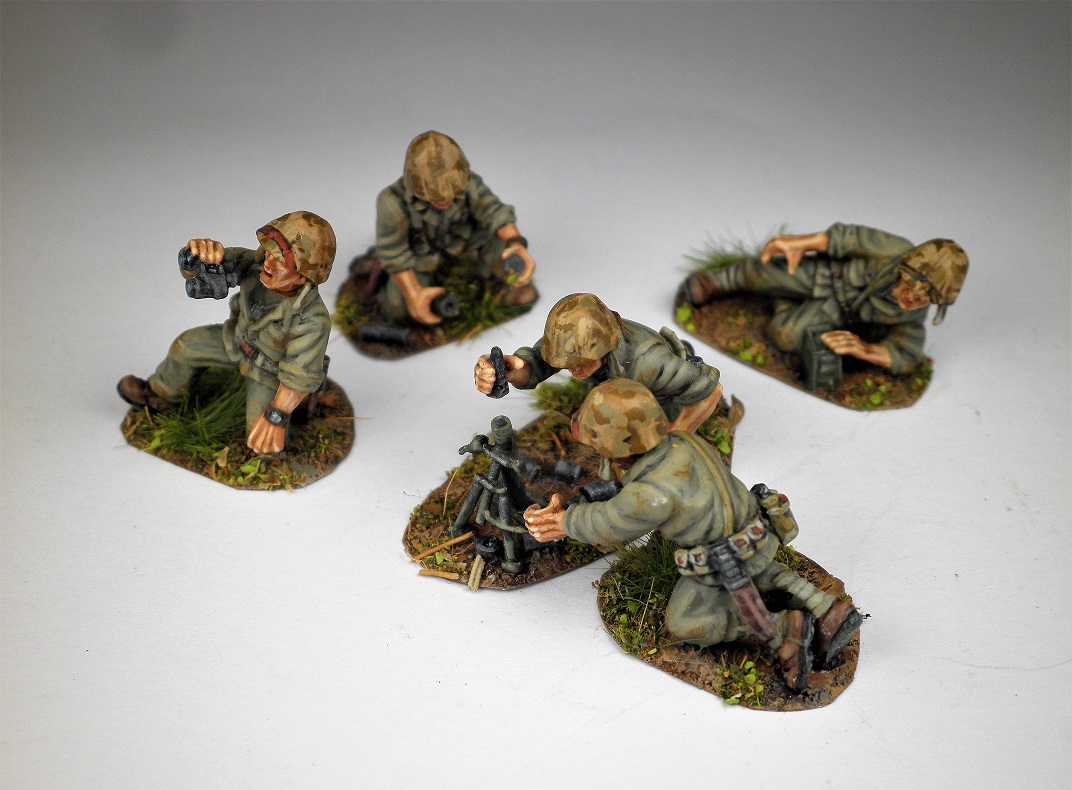
| Painted figure with flock added to the bases, forgot to paint the white stripes on collars of the first two figures, which have been added. |
 |
 |
| I had no gas mask canisters into my parts bin so the figures are without them. |
 |
 |
 |
| Changing of the guards at a road check station. |
LATE WAR GERMAN INFANTRY PAINTING GUIDE

The painting sequence I use for the German infantry is as follows:
- Black prime
- paint the figures' base
- paint flesh parts with flesh base colour and apply wash to flesh parts
- paint the uniform completely
- using Black Grey or black primer to go over any areas that you may have covered while painting the uniform
- paint the base coat for the Helmet, Gatters, boots, Bread bag, gas mask canister, water bottle etc and then coat with the wash and move onto finishing painting each item.
- finish off the flesh parts.
- optional to use VMC Flat Earth with a small dry brush to very lightly dry brush areas that would normally rub against the ground if the figure was in a prone position, elbows, knees.
- once all the painting is finished coat the model with a gloss enamel varnish
- apply a couple of coats of Matt varnish
- apply flock to the figures' base.
Just a note this is a rough guide I used to paint my figures but you may want to alter the ratios as you see fit as you can note from the above image the German uniform varied in colour.

HELMET
Base: VMC German Dark Green 979
Wash: Agrax Earthshade
1st Highlight: Dry Brush: VMC German Dark Green 1:1 VMC Iraqui Sand
2nd Highlight: Dry Brush: add a bit more VMC Iraqui Sand
Details:
Top of the helmet add tiny wear spots with VMC Black Grey,
Around the sharp rim of the helmet add tiny amount of gunmetal to simulate wear.

UNIFORM
Base: VMC German FieldGrey 830
Wash: Agrax Earthshade
1st Highlight: VMC German FieldGrey 830 avoiding cresses
2nd Highlight: VMC Green Grey
3rd Highlight: continue by adding a touch of VMC Iraqui Sand to the Green Grey
Optional highlight: very light drybrushing with VMC Earth targeting the knees, elbows, edges of uniform near the waist , can also some top portions of the uniform to give the uniform a slight brown tinge.

GATTERS
Base: VMC Khaki
Wash: Agrax Earthshade
1st Highlight: VMC Khaki avoiding cresses
2nd Highlight: VMC Khaki 1:1 VMC Iraqui Sand

BOOTS
Base: VMC Mahogany Brown 1:1 VMC Beige Brown
Wash: Agrax Earthshade
1st Highlight: VMC Mahogany Brown 1:1 VMC Beige Brown avoiding cresses
2nd Highlight: VMC Mahogany Brown ,VMC Beige Brown, VMC Iraqui Sand, 1:1:1

BREAD BAG
Base: VMC Green Ochre
Wash: Agrax Earthshade
1st Highlight: VMC Green Ochre avoiding cresses
2nd Highlight: VMC Green Ochre 1:1 VMC Iraqui Sand
3rd Highlight: add a bit more VMC Iraqui Sand to the above mix
WATER BOTTLE

Base: VMC Beige Brown
Wash: Agrax Earthshade
1st Highlight: VMC Beige Brown
2nd Highlight: VMC Beige Brown 1:1 VMC Iraqui Sand
3rd Highlight: add a bit more VMC Iraqui Sand to the above mix


GASMASK/ DRINKING CUP/ MESS TIN
Base: VMC German Dark Green 979
Wash: Agrax Earthshade
1st Highlight: VMC German Dark Green 979
2nd Highlight: VMC German Dark Green 979 1:1 VMC Iraqui Sand
3rd Highlight: add random spots of VMC Gun Metal to simulate wear

WEBBING
Base: VMC Black Primer
1st Highlight: VMC Black Grey with a touch of VMC Iraqui Sand
2nd Highlight: VMC Black Grey with a touch of VMC Iraqui Sand
3rd Highlight: add a bit more VMC Iraqui Sand to the above mix
Cheers John