British Infantry 28mm: Sniper, Adjutant, FO, Medic, PIAT, 2"Mortar.
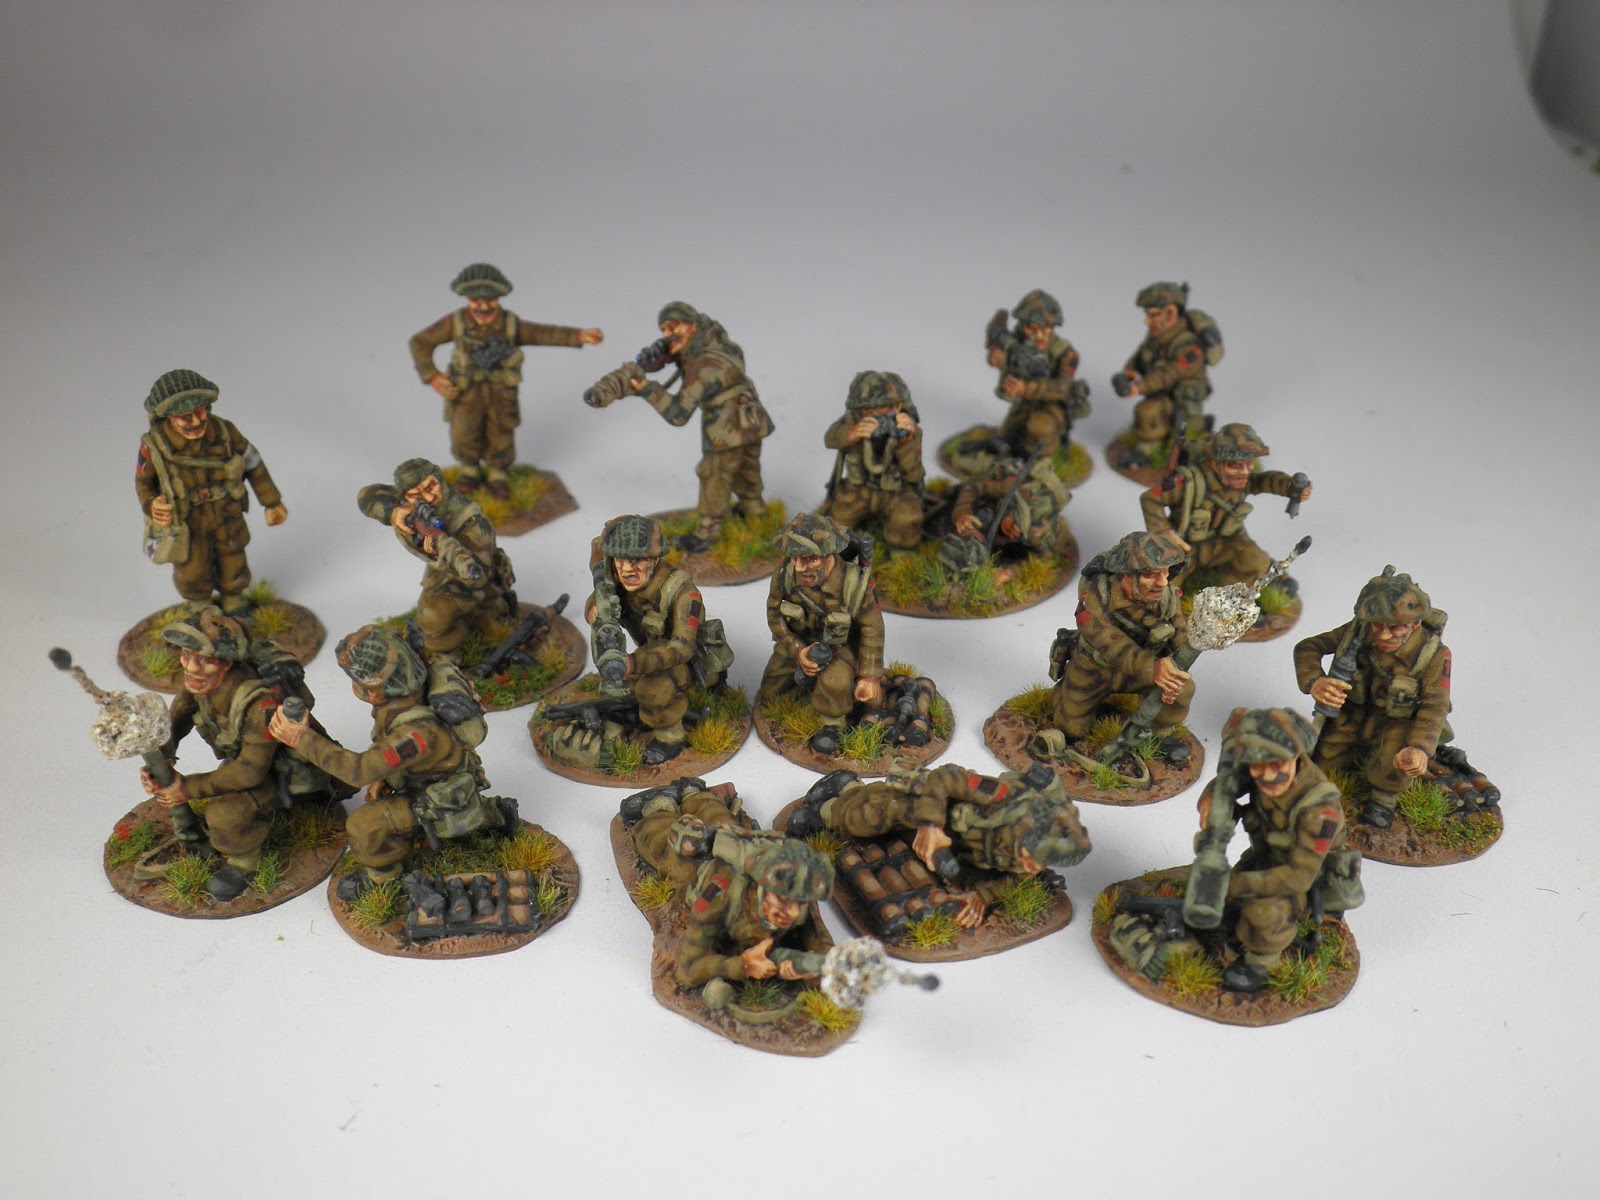

The snipers are modeled from images on the web of Canadian snipers.The standing sniper is a metal figure, the loader of a 3" mortar. I performed metal surgery and removed his head and arms and replaced them with plastic ones from warlords British Infantry kit together with a sniper rifle.I used "liquid green stuff" to blend in his leather jerkin with his shirt to make it look like a Dension smock and modeled a scrim over his head.
The kneeling sniper is plastic, from warlords Brit Infantry, I also used "liquid green stuff" to modify his shirt into a Dension smock. Added a knife strapped to his leg, a Sten with a silencer,ammo sling and partially covered his face with scrim.
Camo strips on rifle done with Miliput and white styrene strips used for gun straps.


All these figures are plastic, the FO team's radio and Medic bag are scratch built, some plastic surgery performed on the FO radio man and guy with the binoculars.


The PIAT teams are all plastic, modifications were made with the inclusion of a PIAT round in the chamber ready to fire, gun straps where added together with helmet straps moulded with 'liquid green stuff'. For a bit of variety I placed the firer's back pack on the ground with a Sten resting on it. As usual, I got a bit excited and made up 3 teams.


The Mortar teams are also plastic, when viewed from the gaming table I wanted to differentiate the 2" mortar teams from the PIAT teams as both groups are in a kneeling position(and my eye sight isn't the best) .
This was achieved by adding a shell exiting the mortar together with a puff of smoke.
The only other conversions are the helmet,rifle straps and a cover for the top of the mortar.


HOW TO MODEL A SHELL EXITING THE MORTAR
 |
| I used this image as a reference, found on You Tube. |
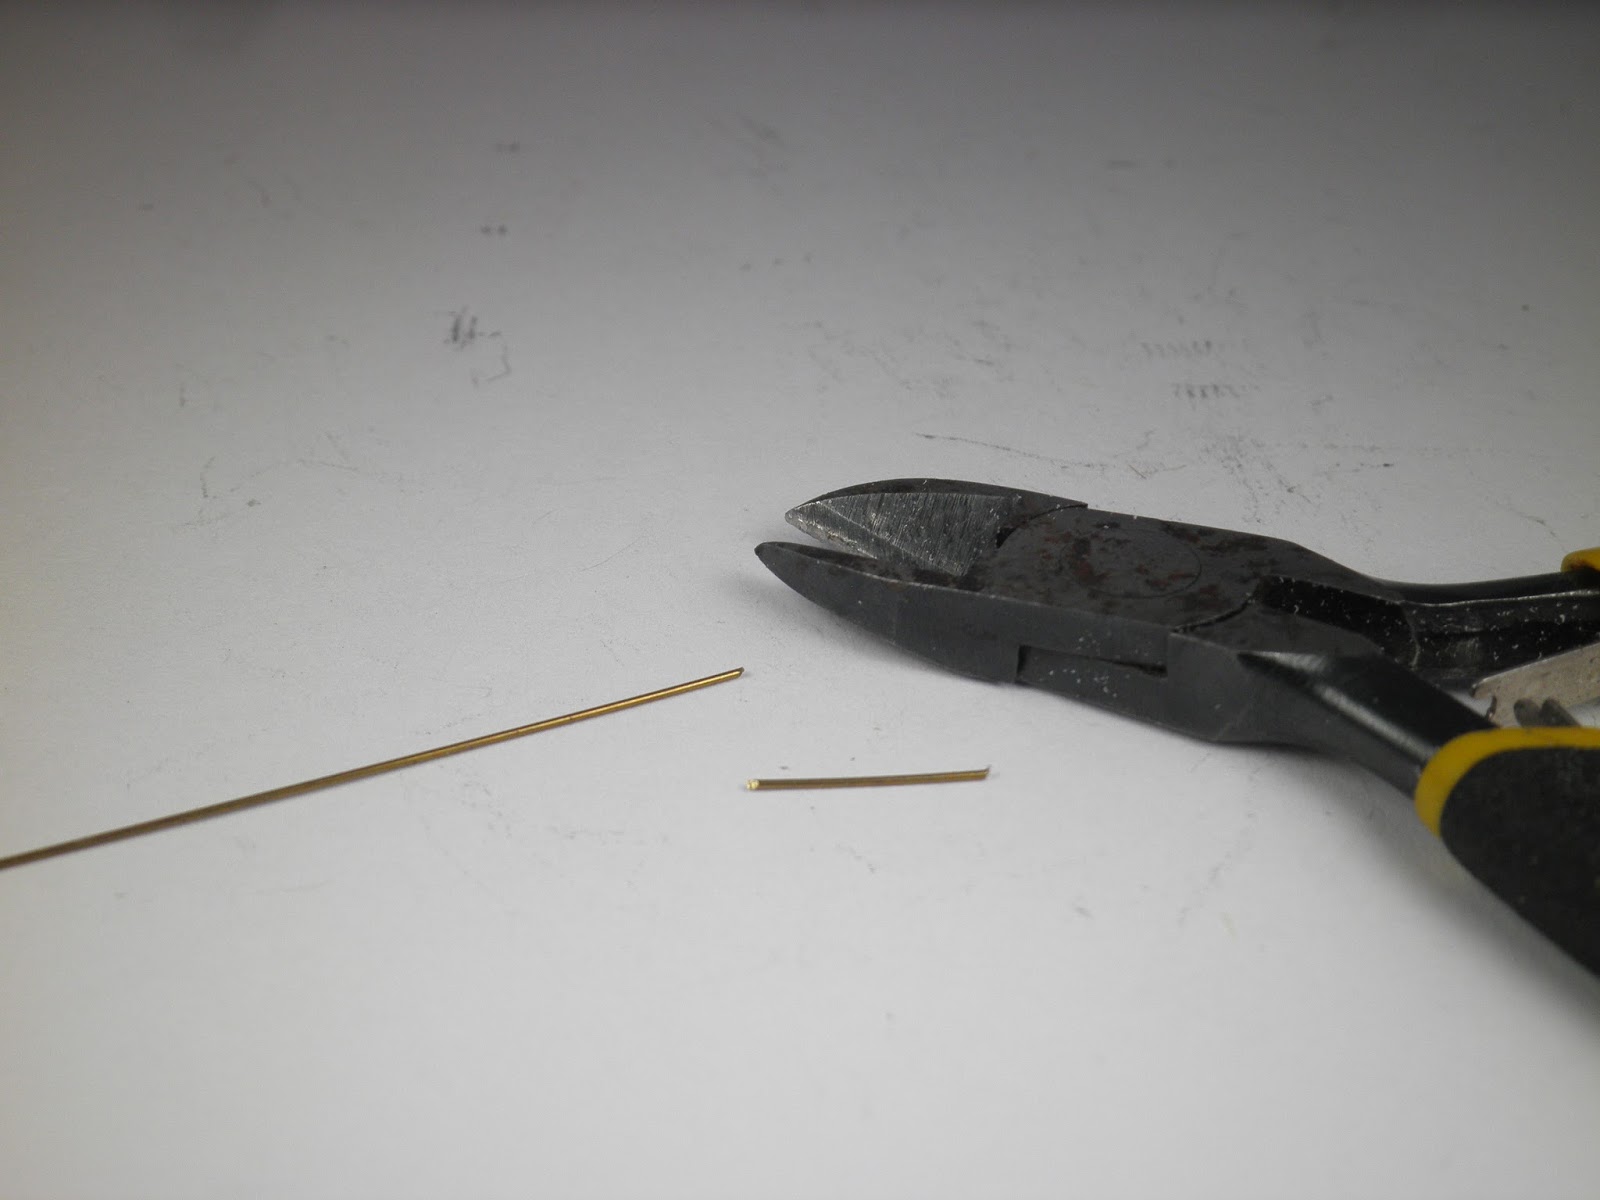 |
| cut a suitable size off a thin brass rod |
 |
| Use a suitable putty to mould the shell |
 |
| Super glue the fine turf flock onto the shank of the rod and glue the small clump of denser flock towards the base allow a bit of the rod to be inserted into the mortar. |
 |
| Using a fine drill carefully drill into the barrel of the mortar |
 |
| check the depth and make any necessary adjustments |
 |
| You can trim the flock or push it about to the desired shape and seal it with super glue. Paint, Off white,followed by a black wash, then dry brush with off white and or Iraqi sand followed by spot painting with off white Paint the shell Black grey and highlight, |
 |
| Once dry, super glue into the barrel and there you have one mortar shell exiting the barrel |