MOAB for the second year in a row has been cancelled due to the CCP/Corona virus, putting an end to my planned Chain of Command event "Early War Action". Hopefully life will be restored to some normality so that the event will be able to run next year.
Gaming has not been possible here in NSW, Australia due to lockdowns which is a big negative for the hobby but it does have a positive side. I have been able to concentrate on constructing Terrain, painting minis and taking photos of my finished minis to post on my blog, so here are my finished Japanese Infantry Platoon.
These are all Warlord games figures and although they are plastic, they are well sculptured which makes painting easier. If you are after metal figures I recommend Eurekaminiatures.
For those who are interested I've also included a painting guide at the end of this page.
 |
| Japanese Section +1 that slipped into the photo. |
 |
| I constructed enough figures to make up 3 sections, plus 1 section as a support option. |
 |
| Junior Leader mounted on square bases. |
 |
Normal infantry men with circular bases.
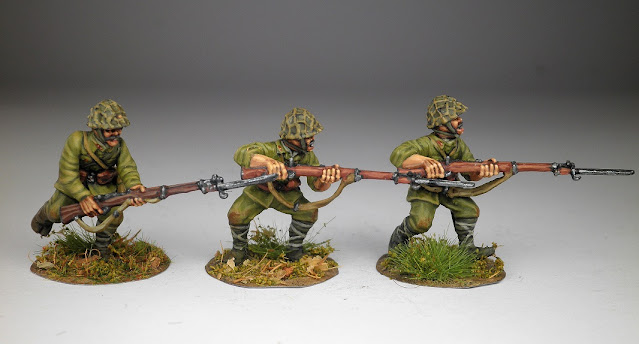
It seem most of the images I have viewed portray the Japanese soldier with fixed bayonets. |
 |
| More Riflemen with mesh coverings on their helmets and with fixed bayonets. |
 |
| LMG teams. |
 |
| I added LMG Ammo magazines into the hands of some of the LMG crew cut off from left over LMGs from the plastic sprues. |
 |
| More Japanese with fixed bayonets and steel helmets without mesh covering. |
 |
To differentiate between the sections in the Platoon, I constructed: - 1 x section with meshed helmets and fixed bayonets
- 1x section without mesh on their helmets but with fixed bayonets.
- 1x section with rifles without bayonets.
- and a mixed bag for the section as a Support option.
|
 |
| Included one Rifle grenade launcher as a Support option. |
Painting guide for Japanese Infantry man:
(note: unless otherwise noted, I use Vallejo Model Colour paints)
Helmet
- Base: Brown Violet.
- wash: Agrax Earthshade.
- Highlight by dry brushing: Brown Violet/ Iraqi Sand. 1:1 ratio
- Further highlight just on the very top of the helmet by adding a touch more Iraqi sand to the previous paint mix.
Helmet with mesh
- Base: Brown Violet
- wash: Agrax Earthshade
- Highlight: metal part of helmet between the mesh: Brown Violet / Iraqi sand(if you prefer you can also use Green Grey instead of Iraqui Sand)
- Mesh:
- Base: Khaki Grey
- highlight: Khaki Grey/ Iraqi sand or Stone Grey 1:1 ratio
- further highlight: add more Iraqui sand or Stone Grey to the mix.
Uniform
- Base: Yellow Green 881
- wash: Agrax Earthshade
- Yellow Green
- Yellow Green / Iraqui Sand 2:1 ratio
- Yellow Green / Iraqui Sand 1:1 ratio
- further add Iraqui sand to the mix for further highlights( this maybe done a few times till you are happy with the results)
- Note that I have noticed when vanishing the end product: better to paint the uniform a bit lighter than normal as when you apply the Matt varnish it tends to slightly darken the colours.
Belt
- Base: Flat Brown
- Highlight: Flat Brown/ Iraqi sand 1:1 ratio
- Highlight: Flat Brown (can also use Red leather) / Iraqi sand 1: 2 ratio
Webbing
- Base: Khaki Grey
- Highlight: Khaki Grey/ Iraqui Sand 1:1 ratio ( can also use Stone Grey instead of Iraqui Sand)
- further highlight: add more Iraqi sand to the previous mix.
Ammo pouch
- Base: Flat Brown
- Wash: Warlord games Nuln Oil
- Highlight: Flat Brown or Red Leather
- further highlight Flat Brown or Red Leather/Iraqui Sand or Stone Grey 1:1 ratio
- further highlight by adding either Iraqui sand or Stone Grey which ever one you used in the previous stage.
Bread bag
Water bottle
- Flat brown base highlight by mixing in Iraqui sand with same colour stages as per webbing.
- The other type of water bottle is painted with Gun metal grey with the outer layer casing as per webbing.
Puttees
- Base: black primer
- Paint all straps with Russian Uniform
- use Stone Grey to paint the cross over portions of the straps
- very light dry brush with Flat Earth
Boots
- Base: Red Leather
- Wash: Warlord games Nuln oil
- highlight; Red Leather/ Iraqui sand1:1 ration
- can further highlight by adding more Iraqui sand to the previous mix
Rifle
- Can use either Flat Brown or Mahogany Brown for the wood base coat
- Highlight by adding Iraqi sand 1:1 to base colour
- further highlight by adding more Iraqui sand
Hope this guide helps with your Japanese painting experience
cheers John


