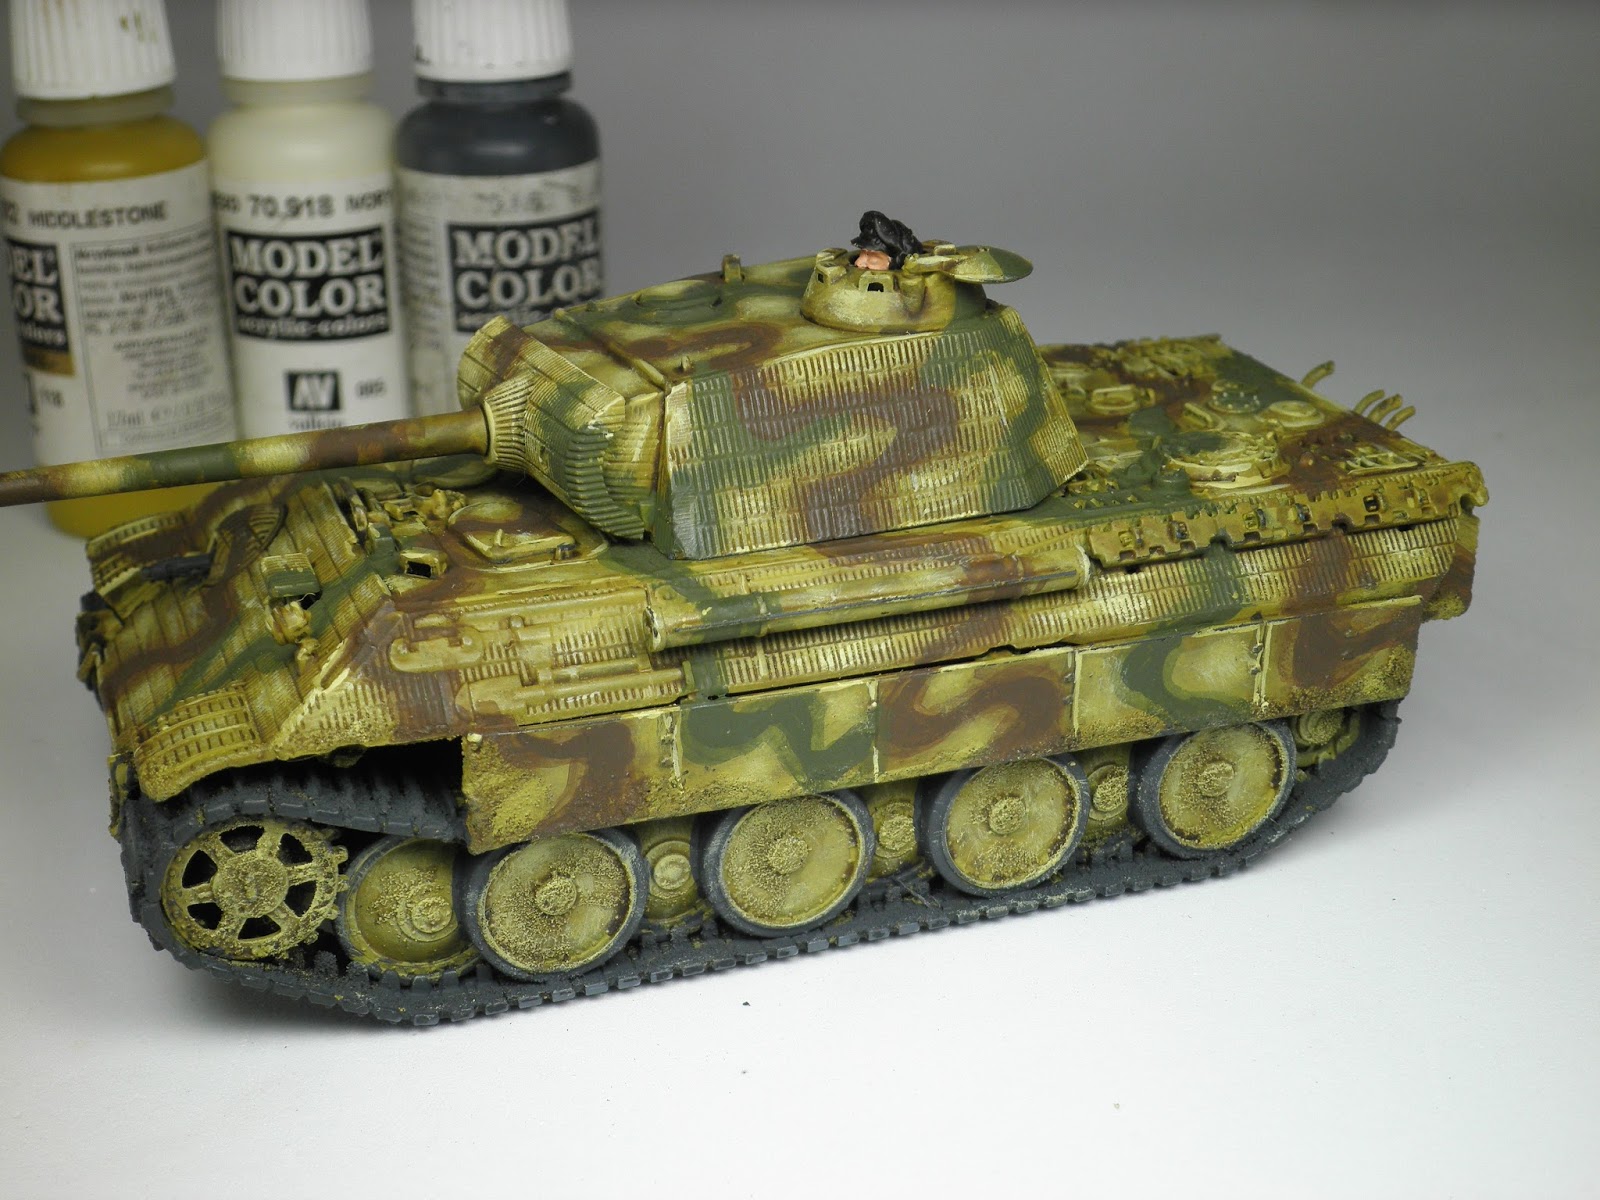
Here is a tutorial for painting German tanks in the later years of the war with brushes.
Hope its helpful.
All these tanks are 28mm.
Completed 2 Panther tanks.
German Tanks include 2 x Panthers, Tiger, 2 x Panzer IV, 1 x Panzer III N and Luchs.
2 x Sd.Kfz 251 D halftrack, 1 x Sd.Kfz 250/9 Neu, 1 x 1 x Sd.Kfz 250/1 Neu, 1 x Puma and a Schwimmwagon.
Tiger tank (Italeri 1:56 scale plastic kits,)
Rubicon plastic model
The tank models I used were the Italeri 1:56 scale plastic kits, "nice little models".
Image shows the Panther assembled with the lower portion of the vehicle coated with fine pumice. follow the link for "How to simulate mud and grit.
Coated with Rustoleum Black Flat Primer.
2 thin coats of Vallejo Model colour Middlestone where applied with a brush.
Apply Agrax Earthshade wash over the whole of the vehicle.
Use a older brush , one you would normally use for dry brushing (hopefully with more bristles than my one in the image, I picked up the wrong brush for the photo) .
Use a old brush with short bristles to apply the base coat (Middlestone).
Apply VMC Middlestone paint on the brush then wipe on a paper towel to remove some of the paint.
In a very light circular motion start applying the paint in the middle of the panels and work out towards the edges as desired.
I recommend practicing this Technic on the underside of the tank first.
You should be aiming for the edges of the paint work to fade into and blend with the already applied base coat that has been washed over with Agrax, Earthshade.
Red squiggles show the areas to target with the Middlestone, note that I have avoided going over the Zimmerit.
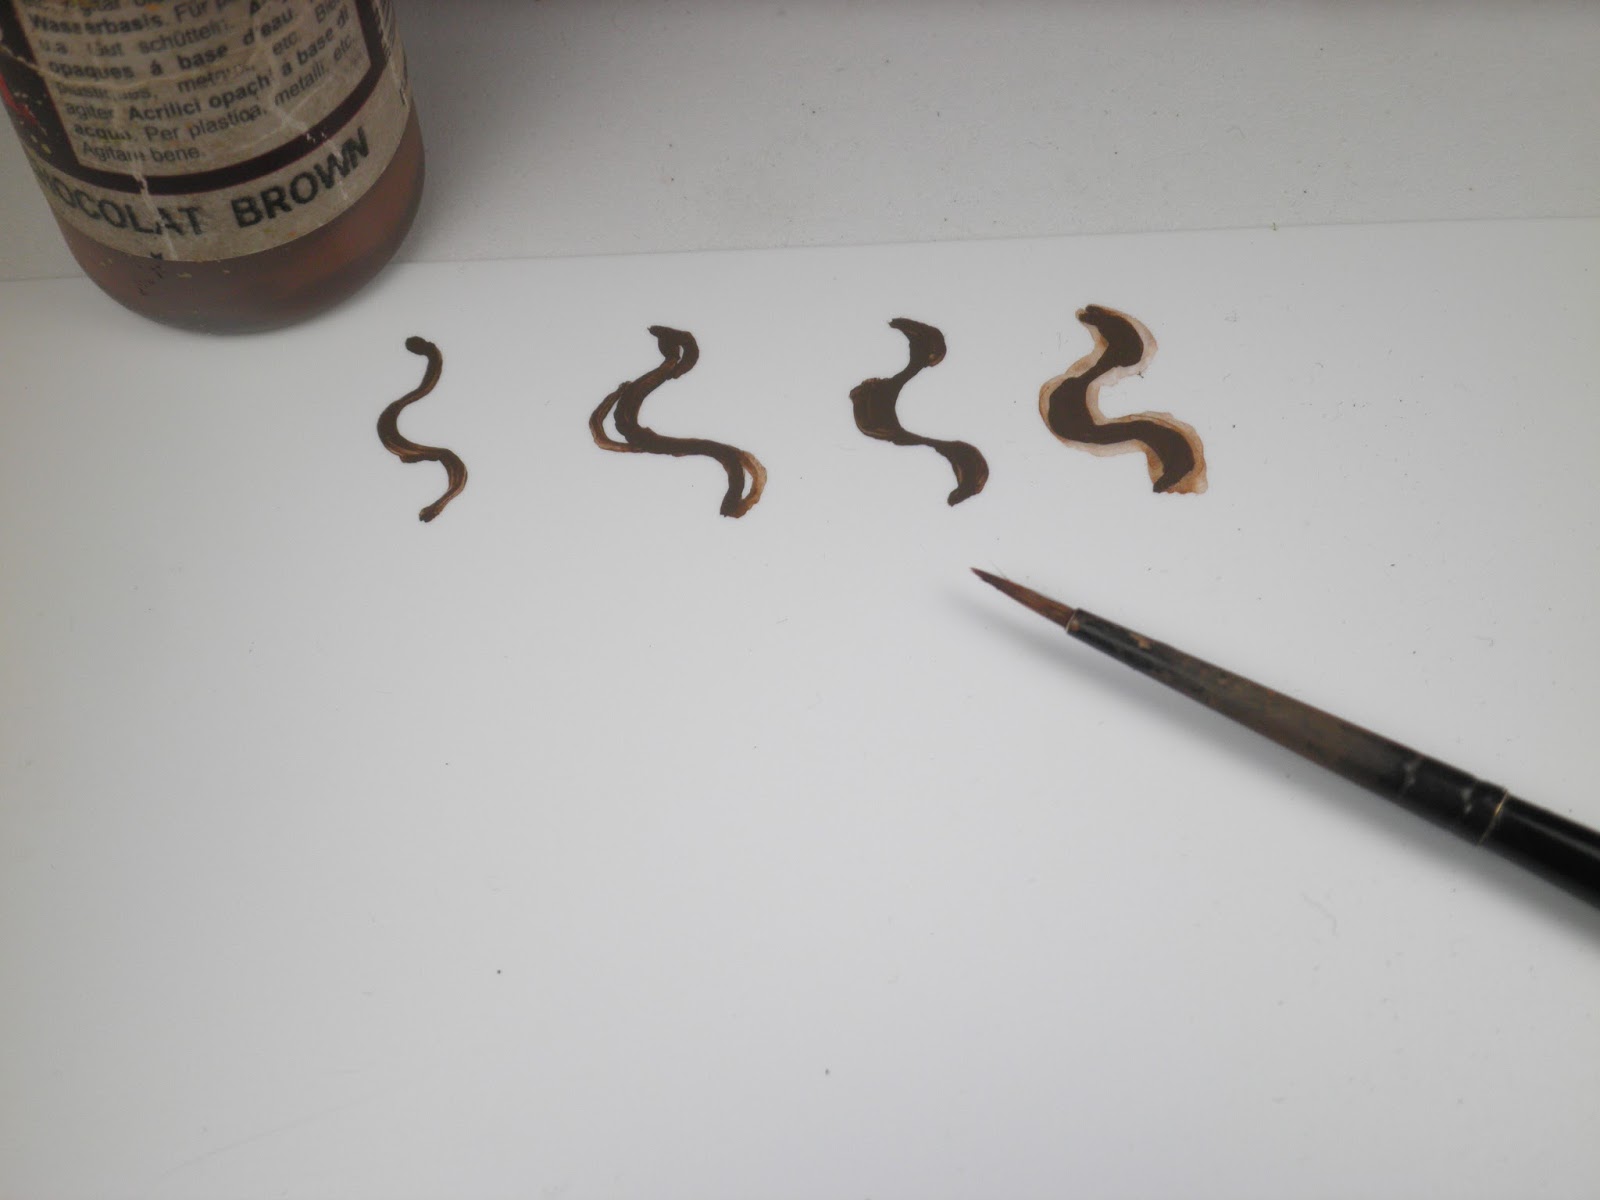
Next step is to paint in the brown camo lines using Vallejo Model Colour Chocolate Brown.
As you can see I have not made a great effort in blending the Middlestone on the Panther as most of the vehicle is covered with Zimmerit but I do recommend taking care to blend Middlestone on vehicles without Zimmerit ,as can be seen with the Panzer III N below.
Following these easy steps, will help with applying the camo on the tank.
1. paint a thin curvy line.
2. enlarge the curves by painting another line just on the curves.
4. thin down the paint to apply a wash over the camo,
you can vary the thickness of the wash as you please.
Note: Its up to you how thick or thin you want the camo lines to be.
and you can also chose not to go to step 4 and make the camo more define.
Once dry use VMC Reflective Green to paint in the green camo on the vehicle.
At this stage I highlight the previously painted VMC Middlestone circular areas in the middle and lightly ran my brush over the areas of Zimmerit that have Middlestone colour.
Be careful not to block out the detail of the Zimmerit.
I used a mix of VMC Middlestone and VMC Ivory ,1:1 ratio.
Using a mix of VMC Middlestone and VMC Ivory 1:1 ratio, apply a very thin highlight on the edges of the tank but only over the Middlestone base colour.
(you can further highlight the middle of these already highlighted areas with a mix of 1:2 Middlestone/Ivory if desired)
I like to leave the brown and green camo areas as they are and don't go over them with the Middlestone /Ivory highlight.
Using VMC Black Grey paint the tracks, tools, MG, tow line etc.

Paint the handles of the tools using VMC Brown Beige, highlight with 1: 1 ratio VMC Brown Beige and VMC skin base.with a further highlight by increasing the ratio of VMC skin base.
Wash the tracks and some of the lower portions of the panel where pumice was added with a thin wash of VMC Earth.
Once dry, use a brush with VMC Earth to pickout and highlight some areas over the Earth wash.
Lightly go over the tracks with VMC Black Grey to highlight them taking care not to eliminate the earth colour that is already on the tracks.
To finish off the tracks use Citadel Leadbelcher to give a hint of highlight to some of edges of the tracks.( add a bit of this colour to any metal parts)
Add a bit of rust to the Tracks or metal tow cable using VMC Calvary Brown and around any hatches,hinges and a few vertical thin streaks on the vehicles as desired.
Add the transfers.
Used to add some wear areas on the vehicle use a very thin pointed brush to place tiny spots using VMC Black Grey , I also like to go over the insignias as well.
The last task to do, use Citadel Thraka ink wash to apply vertical thin random streaks over the vehicle.
Rear view of the Panther tanks.
Cheers John