CLINK HERE FOR A COMPLETE INDEX TO ITEMS ON THIS BLOG

Thursday, 19 July 2018

JUNGLE TERRAIN MAT

This is my first step into the Pacific theater as Chain of Command at CANCON 2019 will be battled in the Pacific. 
I will be helping with the event by supplying Terrain, my first task was creating a jungle gaming mat. 

I decided to construct my mat from fabric material, the reasons for this choice:

  1. its easy to transport, fold, unfold,store and hugs the gaming table. 
  2. creating a hill is no problem: just pop a suitable piece of shaped stryene foam  under the mat.
  3. the fabric adds texture and at the same time other pieces of  terrain such as roads,trees, rivers etc... sit on the mat blending in with the fabric on the mat without creating gaps between the terrain item and mat.


Completed Jungle Mat.

Some trees on the mat to check out the effect.

The fabric I chose for the mat is a 50:50 blend of wool and Polyester in a Natural shade, priced at AUD $18  a meter  but I bought it on special for AUD $9 - pays to keep track of the weekly specials.

I decided to move to a fabric with some incorporated natural material  as I found I achieved better coverage with the paint as opposed to  pure Polyester fabric.
Here is a terrain mat I made a while back for the European theater, I used spray cans of paint to add the colours.

The underside of the mat showing the fleece type 100 % polyester material.

Back to the Jungle mat , this Image shows the  fabric sitting on 6 x 4 foot  gaming table in my garage.

Thankfully my gaming buddy and I had a short break from Operation Martlet, for the Football World cup which gave me the opportunity to use the table for this project.

Fabric spread out over the table ready for its conversion into a jungle mat rather than into winter suitings.


I used standard student Acrylic paints purchased at AUD $10 for 4 tubes which will be applied with a paint brush. The colours I used were Cadmullian Yellow, Cobalt Blue,Yellow Ochre and Burnt Umber.
The technique I used to create the illusion of texture on the surface of the mat was drawn on my school days experiences in Art class.
As per the image, the transfer of a image on the underside of a piece of paper to the top ,can be achieved  by rubbing on the paper over the object with a pencil or crayon.
This action picks up the high spots of the object and transfers it onto the paper.
To achieve this technique I used this piece of terrain I made for my Europe Terrain.
Its  a paddock constructed from a  piece of heavy canvas  with caulking thickly applied on the top to create a uneven surface and coated with different flock.
I placed the piece of terrain under the fabric,using Burnt Umber paint with a paint brush I rubbed the paint onto the fabric creating the texture.
By adding a bit of Yellow Ochre to the Burnt Umber you can vary the shade.

To create different texture you can experiment by placing different item on the underside of the fabric.
The lines where created by placing some electric wire on the underside of the fabric.

To create the greenery, mix blue and yellow paint together to create Green paint.
Use the brush to dab onto the mat, vary the size and the colour of the green by adding a bit more yellow.
Allow to dry and using Burnt Umber or a mix of Burnt Umber and yellow Ochre, lightly dry brush over the green areas to make them blend in with the rest of the mat.
Completed jungle mat.

 The  plastic palm tree on the mat is my first attempt  painting  and basing palm trees. 

Cheers John 

Monday, 2 July 2018

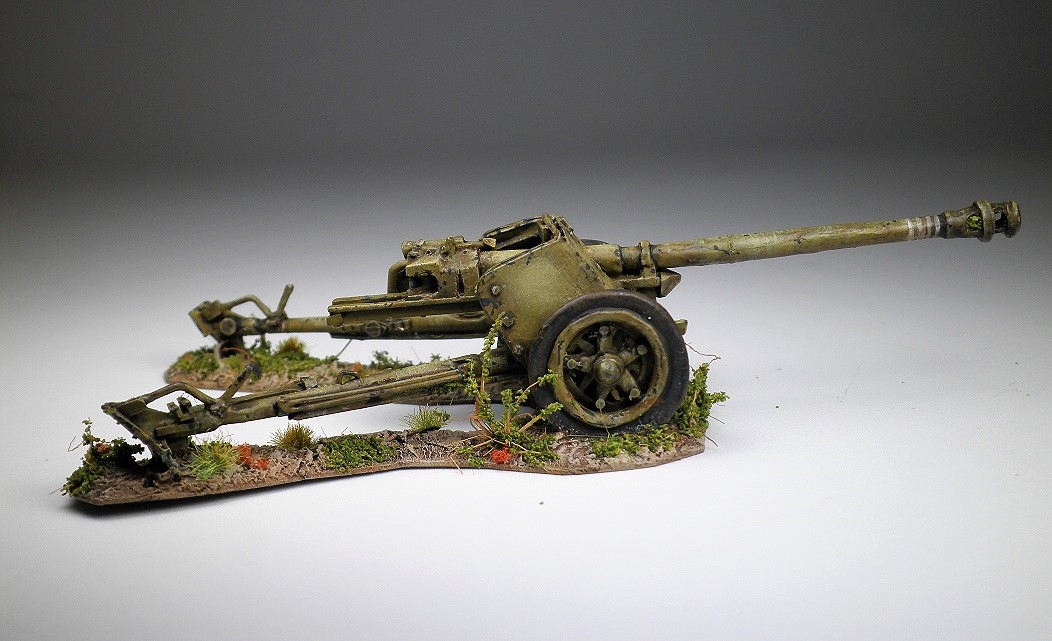
PAK 40 Anti tank gun 28mm

Scratch built Pak 40  anti tank gun with a Junior Leader and 5 crew,all of which underwent some plastic surgery to modify their poses.
Pak 40 ready for action.

Start of the building process,using plastic sprues, bits of brass rods, evergreen stryene sheets.
I sketched  images of the gun to workout scale and details .

Image showing the assembling of the crew, the length of the gun barrel was too short and had to be adjusted.

The length of the gun barrel was increased in length by chopping it in half and attaching another piece of plastic and strengthening the join with green stuff putty. 

Each wheel was constructed using two plastic infantry bases carved and glued together.

I think I went a bit overboard with the detail on this gun, 

The gun is based on magnetic sheet, thin metal wire was super glued on-top of the magnetic sheet to give it a bit of strength and coated with Milliput putty.
The  base colour I used for the gun was Vallejo Model Colour Middlestone.


All the crew received some plastic surgery, The ammo rounds and canisters where carved from plastic sprues, the ammo crate from Evergreen styrene sheets.

The figures are a mix of Warlord games plastic German Infantry and Grenadiers.


Image shows the filling in with bits of plastic styrene pieces  in the area where the leg connects to the torso, this is later built up with Green stuff putty and contoured. 


Crew painted and flocked.

The last figure is the gunner, this figure will be glued in place on the gun.


cheers John 

Wednesday, 6 June 2018

TRANSPORT and STORAGE CASE FOR MINIATURES

Storing and Transporting your Troops,rule book and gaming accessories to and fro from a gaming event effectively is always a issue for wargamers no matter what scale miniatures you game in .

My solution the humble plastic utility storage drawer system for offices. 
My entire Late War British Platoon together with all there supporting elements all contained In one container. 

Which fits neatly into a collapsible polyester cooler bag.

Zipper closed and ready for transport to the gaming venue.
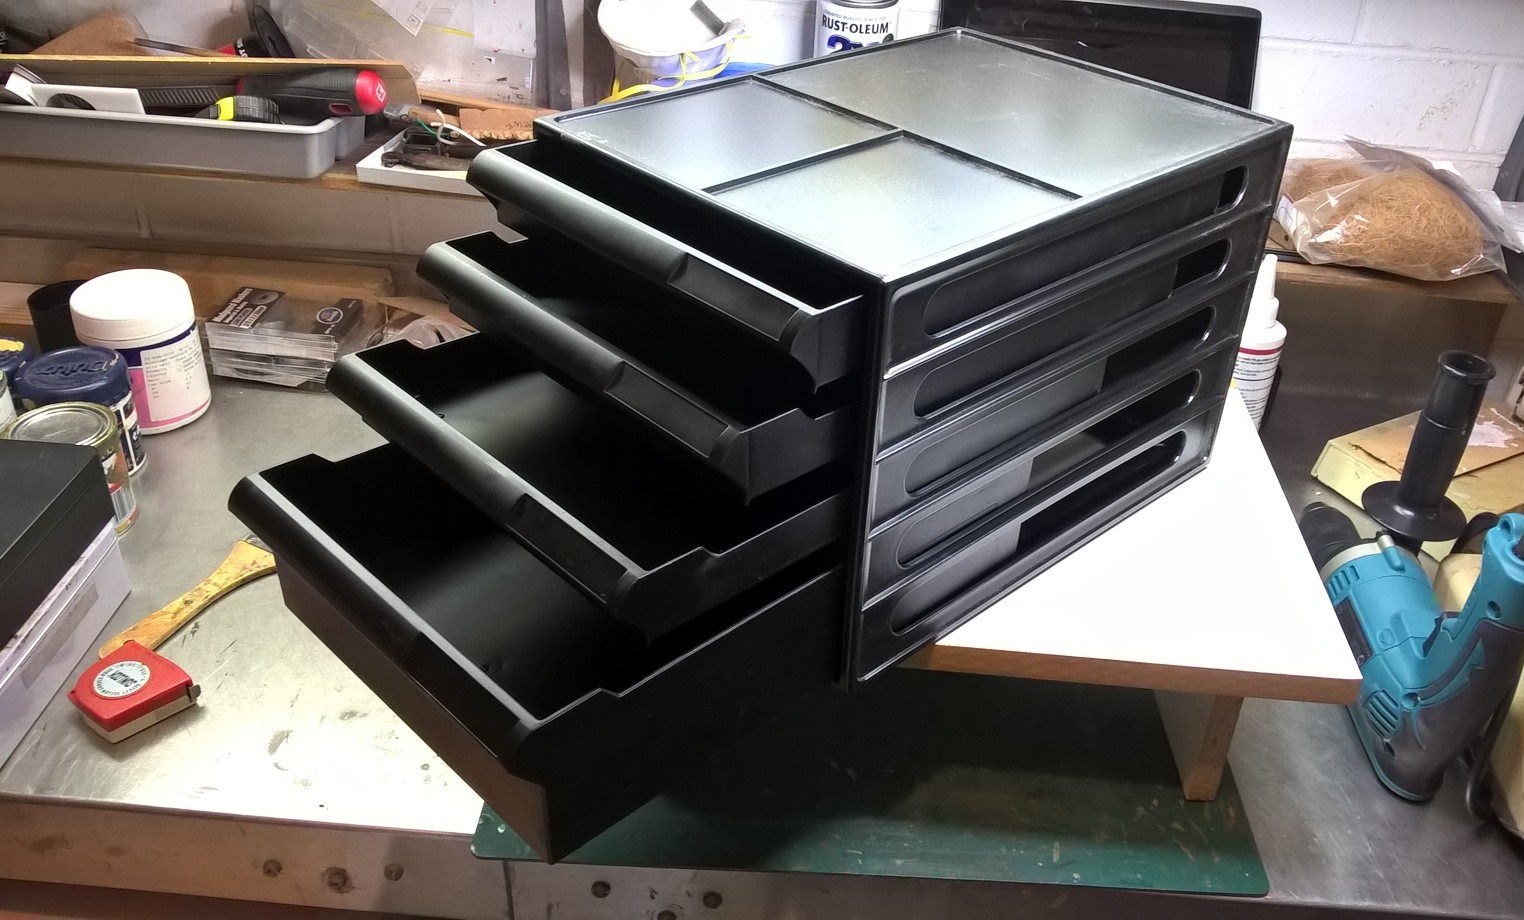
Plastic drawer container purchase at Office works for about AUD 16 dollars.


Image showing the drawers.


First step is to remove the drawers this is done by press on the end portions of the plastic drawer while pulling each drawer out. This is done to disengage the small spurs of plastic that act as stops to prevent the drawer from being pulled out completely.
Once the all the drawers are removed you can choose to leave the spurs of plastic intact or cut them off, I chose to cut them off because I wanted to be able to remove the drawers.
Locate a large empty can of cooking oil, I found this on the side of the road near a restaurant.


Use a sharp instrument such as a chisel with the help of a hammer make a indentation in at the top of the  can this will act as a point for the insertion your tin snips.


Wearing gloves carefully cut the metal and remove the top portion of the tin.( I took off my gloves just for the photo but did use the gloves pictured in the background)


Next cut down till you reach the end of the base, as you reach the lower portion of the base start angling the cutters so that you can cut off the bottom base portion of the container.


Completed task, next step is to cut the large sheet into 2 pieces and carefully wash down the metal with soapy water to remove any oil residue.
Flatted out the pieces by applying even pressure on a flat surface.
If you are not up to the task of prepping the oil can you can just buy a notice board with a thin metal sheet and remove and use the metal sheet.

The base of all my figures are magnetic that is why I am using metal sheets.

An easier way to obtain metal sheets is to purchase cheap metal notice boards from a 2 dollar store and remove the thin metal sheeting and use that.

I you are using metal washers for the base of your miniatures you can skip these steps and purchase and use Magnetic sheet in place of the metal sheets. 

Measure the inner portion of the drawer and transfer the measurements onto the metal sheets using a sharp instrument or permanent marker.


Cut out the sheets with tin snips.


Round off the pointed edges and lightly sand the top surface of the metal sheet in preparation to receive the spray paint later. 


Clear Silicon was placed on the base of the drawer, the metal sheet placed on top and allowed to set.


Drill 6 holes into the metal and out thru the plastic drawer, use a drill bit to match the rivet size.


Using a Rivet gun with suitable rivet.


Use the rivet gun to secure the rivet in place.


Image showing the firmly in-bedded rivet.

The large bottom drawer of the container had to be leveled using 2 pieces of 3mm MDF.


MDF pieces glued in place.

All the surfaces where sprayed with Rustoleum primer paint you can also coat them with a light coat of clear Matt vanish.


Completed storage container.
You can choose different colours for different armies.

What I will be using for the next part of the project are foam core boards, I managed to pick up a few of these  for a couple of dollars from a reject/recycling store.
Since these are old advertising boards, one side is coated with a plastic which increases the strength of the foam board.
The right image shows the underside of the board.

Position your miniatures on the foam as desired.

Lift the base of the model and poke a hole using a sharp pointed instrument in the middle,   where the base was located

Use a drill with a matching drill bit just larger that the base of your figures and start cutting the holes in the foam board using the guide holes to locate the tip of the drill bit.


Completed circular holes for the troopers

Use box cutters to cut out the square and hex shapes into the foam board.
And lightly sandpaper the edges of the holes.
Foam core board glued to the metal base.
 I used red paint to help identify the different elements within the Platoon. 


1st tray: Clearly visible are the 3 different Sections , PIAT, 2" mtr and  Senior Leaders. 


Second tray: The support options include extra Section,Section of infantry in fox holes,PIAT team, 2"mtr, Vickers Machine gun, 2 Snipers, Adjutant, Medic, FO, JOP markers,Demo team, wire cutting team,Mine detecting team and Flamethrower team.

3rd Tray: More support options, 2 Bren carriers, Halftrack,Stuart tank, jeep , different Turrets for Churchill tanks and flame thrower trailter for the Churchill croc.


4th Tray: Which is the deepest drawer houses all the tanks and some gaming tools.


the tilting of the tray shows how the tanks adhere to the metal base on the tray, to achieve this I placed magnets on the base of the vehicles, this stops the vehicles crashing into each other when the container is being transported. 

Using  a hobby drill( match the drill bit size to the earth magnet that will be used) to create 4 holes on the underside of the tracks make sure to create the hole in a thick portion of the plastic.
Place super glue into each hole
Place the magnets into the prepared the holes.
Then place the vehicle onto a metal sheet and allow time to for the glue to set, this ensures that all the magnets will be at the right level so that each magnet grips on the metal.
Currently I am into  Scenario 2 of Chain of Command Operation Martlet campaign game.
The use of the tray helps greatly in keeping record of the troops that I have available for the next game.

Last of all, a big thanks  to Mark from "The Tactical Painter" who brought to my attention this type of Platoon Board.
"Its worth visiting his blog for his take on the board".
    cheers John