New additions to my Scratched built MDF buildings which includes some bombed out buildings.
I still have a number of building to complete which are ideally suited to the upcoming CANCON event, I should be posting them soon.
 |
| Before and after shoot of plain MDF on the left and on the right after etching the detail in with a hand motor. |
 |
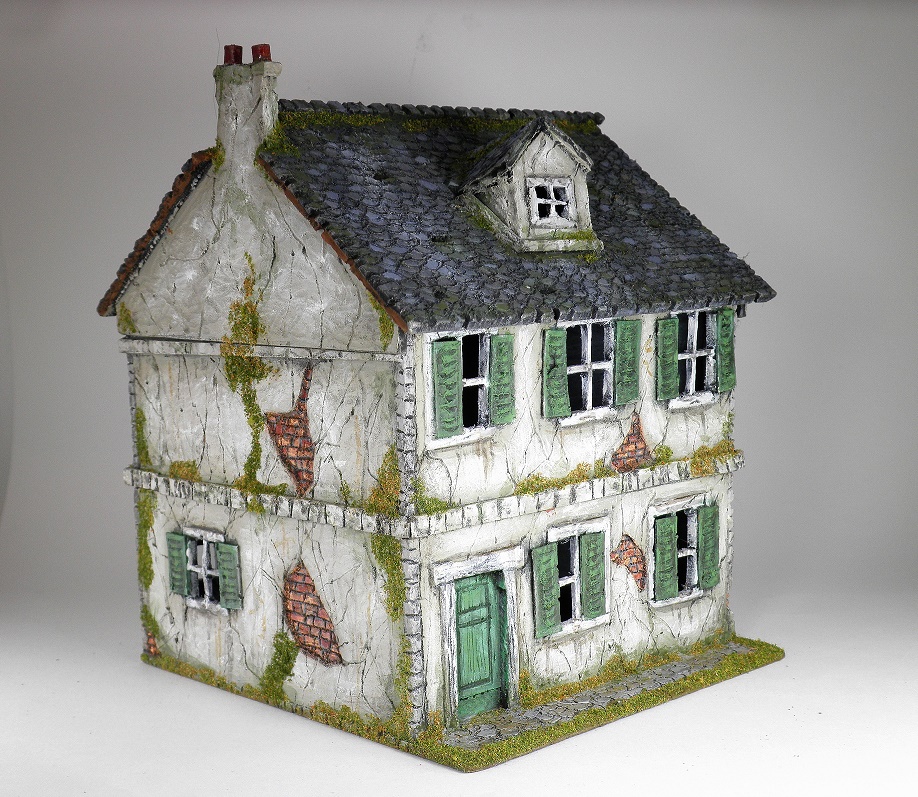
| Building number 1 |
 |
| Building number 2 |
 |
| I am using the wooden cubes for relocating the upper floors, simple and works well. |
 |
| There allow for a easy secure fit . |
 |
| building number 3 |
 |
| Building number 4 |
 |
| Once again I used plastic sheets to simulate smashed glass. |
 |
| Bombed out building number 1 these will come in handy with early war action. |
 |
| Bombed out building number 2 |
 |
| Bombed out building number 3 |
 |
| Bombed out building number 4 |
 |
| Small hotel/cafe |
 |
| The piano and the benchs are scratched built from MDF. |
 |
| Last building |
Cheers John


Lovely additions John. You are a prolific terrain maker mate.
ReplyDeleteThank you Furt for your comments
Deletecheers John
Superb scratchbuilds :)
ReplyDeleteThanks TamsinP for your comment
Deletecheers John
Lovely work allround and interesting to see how you made and detailed them etc.
ReplyDeleteThank you Steve
Deletecheers JOhn
This is beginning to get boring! couldn't you make at least one lousy piece just so I don't feel so inferior?
ReplyDeleteAll kidding aside, Nothing short of the best diorama builders approach this
Sorry Dick, I'll try to post a lousy piece, just kidding , I can't. thanks for your comments
Deletecheers John
Ps. Dick I have sent you a email just now
These are so good John, inspirational stuff.
ReplyDeleteThank you Michael for your comments
Deletecheers JOhn
Absolutely outstanding. I'd like to try this approach but have zero idea of where to start.
ReplyDeleteThank you Ian for your comments
Deletecheers John
Woooow! Really awesome work!
ReplyDeleteThank you Michal for your comments
Deletecheers John
Great work John, how did you do the pinkish colour? Ifind the use of the flock particularly effective.
ReplyDeleteThanks John for your commments, I use Vallejo paints for the buildings and the pinkish colour is actually Game Colour 72 066 Came Marron Tan as the base colur and I gradually add VMC Ivory 70918 into the mix to get the lighter colours as I highlight it.
Deletecheers John
The visual effects are amazing! Bravo!
ReplyDeleteThank you for your comments
Deletecheers John
Inspiring stuff, Mr Bond. Especially the painting and detailing. I don't have your skill or commitment to scratch build but I will definitely be copying your finish on to my MDF buildings.
ReplyDeleteGood to hear Jim, make sure you post work so we can see them.
Deletecheers John
Those are just lovely John. Very atmospheric, and suitably aged. I don't thin kI have ever seen better, and the painting and weathering just brings out the best in them.
ReplyDeleteHaving used the Dremel to attack commercial MDF kits, I can appreciate just how much work has gone into these. Absolute little masterpieces every one.
If you ever decided to put your work on sale; personally, I couldn't buy one, as it would make everything I built myself look like it was Lego thrown together by a three year old in a tantrum, but I am sure those would command great prices.
I do have one project I intend to scratch-build, which is a signal box for an upcoming game, I am going to use yours as inspiration.
Thanks Doug and good to hear you are going to build the signal box, good to hear I have inspired you.
Deletecheers JOhn
Great work, John. Really excellent. It must make hell of a lot dust scribing all these pieces but end result looks very good.
ReplyDeleteThanks Kym and yes plenty of dust, need a industrial type of mask, protective long sleeve apron and done outdoors
Deletecheers John
Those are georgeous! It´s not modelling..it´s art!
ReplyDeleteToo kind Paul
Deletecheers John
The amount of artistic skill shown here is unfathomable. The modeling, carving of details, color selection and application of shading and weathering. Add to that that they're all removable roofs/floors so they're EXCELLENT wargaming pieces. Top notch. I'd be thrilled to have even one this nice and you've made a whole town!
ReplyDeleteToo kind Allan thanks for your comments.
Deletecheers John
Absolutely brilliant! The fact alone that you build all your buildings from scratch is already impressive! But the creativity in these is just marvelous! I love the shapes of the bombed out ones, especially the ony with ohnly the wall with the chimney still standing! Nice details (the broken glass) too!
ReplyDeleteThese are a real inspiration!
Thank you Mark, the bombed out building are the easiest to build
Deletecheers John
Absolutely fantastic as always John, what a superb collection.
ReplyDeleteCheers,
Pat.
Thank you Pat
Deletecheers John
Gorgeous work as ever! Again I‘m mightily impressed with all the details you add to your buildings. Really helps to set the scene.
ReplyDeleteThank you Nick for your comments
Deletecheers John
How many hours did a single building take? What part was the longest; painting, etching, or just general construction?
ReplyDeleteI always am working on a number of different projects so I can't really say, Once I know what type of building I what to build I make out the design on the MDF and cut it out this will be the walls both ground and 1st story and the base and glue them in place, allow the glue to dry overnight. day 1, Day 2 I will cut out the chimney and glue it in place. day 3 I will cut out the 2 roof panels glue them together and allow the PVA glue to set. day 4 I will add small pieces wood to reinforce the roof and the walls allow to dry day 5 will cut out doors and windows and etch the detail, day 6 at shutters, doors, matches for the windows that support the glass and any odd scatter on the building day 7 I will undercoat it with a primer, day 9 allow a couple of days to set and then spend the next day painting the building, the following day I will flock it. As you can see I will also be jumping from one protect to other so while sometime is drying I will be painting up some figures or vehicles or making a new terrain piece. I usually take my time
Deletehope this helps
cheers John .