Its not a exhorting AAR but just a brief outline of the game.
The scenario is basically trying to portray scattered retreating British teams trying to gather around specific rallying points represented by the two JOPs in the woods and trying to hold and or exit off the bridge, while the Germans are trying to capture the bridge and cut off the British retreat.
 |
| The table has a series of ploughed fields along two sides of the table with small hedges lining and dividing them. The area with trees are woods with a cobblestone road running thru the middle. |
 |
| The road is littered with damaged and broken down vehicles and other debris which breaks up LOS down the road and provides some cover. |

 |
Each British team will be deployed in base contact with
the designated JOP (marked in Blue) for that section on a 1,2,3 by the Command
dice.
Once the whole section
has gathered together they maybe activated to move or fire.
The objective for the
British is to either deny the Germans access to the Bridge and retire as many
of their troops off the bridge across the canal within the 3 hour time slot.
The Germans have gathered a hastily put together force
of troops trying to take the Bridge thus cutting off the path of the retreating British and trapping as many British troops on this side of the
Bridge.
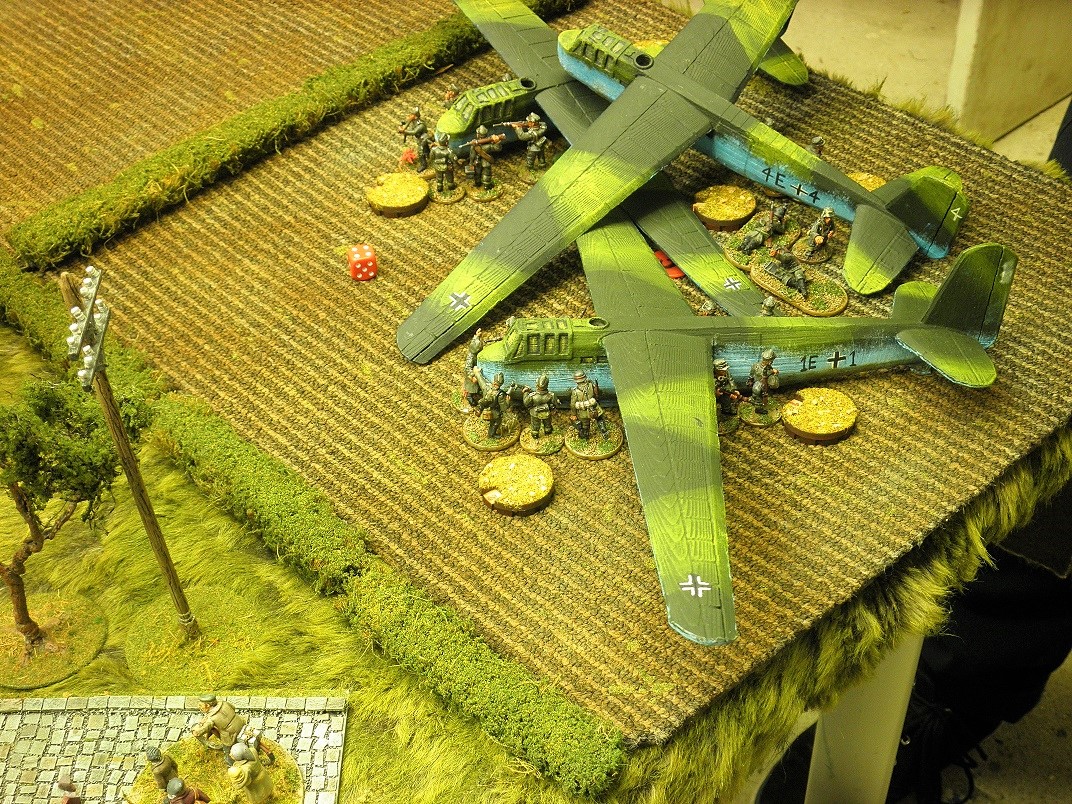
The red dots are possible
landing sites for the German gliders which have to be diced for to see where the
gliders land.
|
 |
The civilians start the game on the far end of the bridge and on each
German turn 2D6 are rolled for their movement towards the bridge , hoping
to escape the carnage and possibly reward the British with a increase in their
Force Morale using a D6.
|
 |
| The Germans have rolled to establish the random landing points for their gliders. One glider has landed in the small ploughed fields closer to the bridge while glider 1 and 3 have safely landed on the same ploughed field, unfortunately glider 4 has collided with glider #4. |
 |
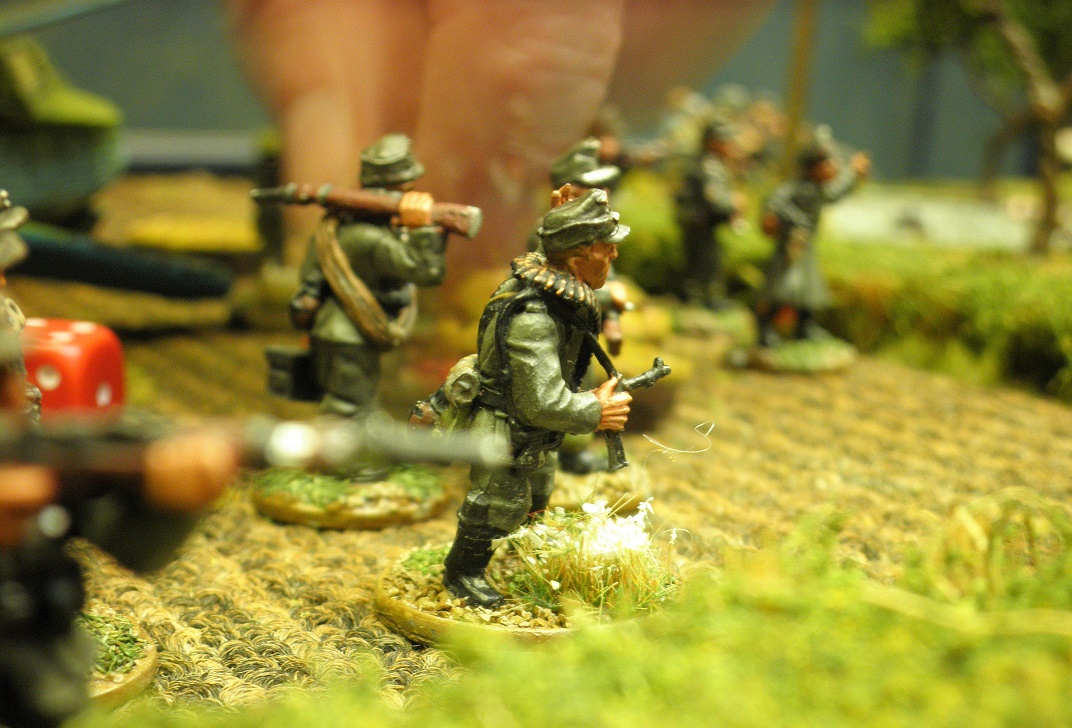
| The troopers deploy next to their gliders and roll for possible shock, The Rifle team only receives one point of Shock while the LMG team receives 6 points of Shock. |
 |
| The other gliders have a similar outcome with the LMG teams suffering a greater number of Shock but no Kill results on the crashed glider. |
 |
| Brits get a Senior Leader and whole section on JOP 1 |
 |
| A rifle team with Junior Leader arrives at rally point 2 |
 |
| Another rifle team with Junior leader arrives at rally point 3 so the Brits are slowly assembly their sections. |
 |
| The Germans are keen to get going but first they need to reduce some of the Shock they have accumulated. |
 |
| And manage to slowly move. |
 |
| As the game progresses the British section at railing point 2 manage to deploy a full section and a Senior Leader and initiate Close Combat against the single Germans section that is desperatly trying to rally off Shock. They do manage to eliminate the German rifle section but unfortunately suffer a number of casualties and are forced to retreat suffering more Shock that PINs them. Further German fire knocks down the Junior Leader but the Medic is attending him. |
 |
| The Germans on the far side, start to decrease their Shock and start moving towards the bridge. |
 |
| Activated by the German Senior Leader the troops are on the move. |
 |
| As the civilians are slowly moving towards the bridge, the British section from rally point 2 decide to move onto the road to deter the Germans getting too close to the civilians. The Germans can be seen stopping short of the road. |
 |
The Germans decide to move parallel with the road and retain their hidden status to outflank the Brits next to the truck.
|
 |
| The British Section that initiated Close Combat has been taking fire from the German LMG team in the woods and the German light mortar piling on the Shock til they Break to the edge of the canal . |
 |
The civilians are making good progress towards the Bridge.
On seeing the 2 German sections move to outflank them the British section behind the truck on the road decide to move to engage the lone German LMG team in the woods to their right. Unfortunately they rolled too high on the dice and bumped into them initiating Close Combat .
The German LMG team was eliminated together with their Leader but they too suffered some casualties and Shock.
The British section on the bridge is placed on overwatch anticipating a German assault of the Bridge very soon.
|
 |
| The British section is joined by a Morris Armoured car making it way up towards them. |
 |
| One German section has moved from the woods to take up the abandoned British position at the truck on the road. The other German section has moved into LOS of the British on the bridge and triggered overwatch , unfortunately the fire was not as accurate. I fiece fire fight erupted during the next couple of Phases with both sides Force morale lowering the Germans down to FM of 5 while the Brits down to FM of 4 . |
 |
| The civilians manged to escape safely however their were not that accommodating with the help from the British as the D6 roll for the Brits did not result in a boost to their force morale. The battle continued until a Chain of Command Dice was used to end the game turn resulting in a British Leader routing and rolling badly on the BTH roll. The result a German victory the British troops surrendering a few troopers managing to hop onto the fleeing Morris and escape capture. |
A entertaining and challenging game, I was a bit rusty with some of the rules as I had not played for a while and need to clarify some points to make for a smoother game next time.
Cheers John
Well CANCON will have been the lessor for your absence and that terrific board.
ReplyDeleteThank you Unlucky General for your comments
Deletecheers John
Wonderful looking table and a great scenario. Well done!
ReplyDeleteThank you Codsticker
Deletecheers JOhn
Difficult to be a civilian in a war period...Great report, splendid figures on a specatcular and atmospheric terrain, must have been a great moment!
ReplyDeleteYes agree Phil luckily the civilians made it in my game and thanks for the comments
Deletecheers John
That is a great looking table, sorry you missed CANCON.
ReplyDeleteThank you John, I had to cancel going on the night before , luckily the co organiser was able to pack his car with all my terrain and transport to Cancon for the event.
Deletecheers John
Hi John, I saw a "walk-through" of the CanCon tables and it noted how many of them were done by you. Outstanding, mate - absolutely top hole. Whose figures and vehicles were you using for each side? (I think the carriers in your banner are 1st Corps, aren't they?) I can't post on the TFL forum at the moment, but Herr Clarke is sorting that out. Cheers, Brendan.
ReplyDeleteBelay that - I've just read the carrier articles and they are Warlord; it was the open-mouthed figure in the back of one of them that made me think of 1st Corps (kind of a trade mark for them).
DeleteThank you Baron for your comments, yes they were conversions of Warlords plastic carriers. hope to get onto the TFL forum, lots of good stuff.
Deletecheers John
Love the table, any avice or photos of the making of?
ReplyDeleteThank you Meldinov, if you look in the under the main image of the 2 bren carriers on top of my Blog there is a link to index of my blog which may be helpful in location posts.
Deletecheers John
Gorgeous!
ReplyDeleteThank you Nick
Deletecheers John
Lovely looking table and dynamic layout, with great 'photos as well.
ReplyDeleteThank you Steve for you comments
Deletecheers John
Great stuff John, very impressive and looks like a fun game too. Sorry to hear of the crisis, hope all is well now and best wishes.
ReplyDeleteKym
Thank you Kym for your comments, things are stable as the moment at home.
Deletecheers John
Wonderful stuff as always John. Always admire the quality of your tables, terrain and figures, not to mention your sensational scenarios.
ReplyDeleteThank you Carlo for your kind comments
Deletecheers John