
 |
| Road Block |
 |
| I purchased the mini dolls house furniture initialing to scatter them among the interior of buildings but found although they looked great it become a bit of a hindrance and nuisance when placing figures within a building. So I decided to make a road block out of most of them and only keep a few items of furniture as scatter terrain within buildings. |
 |
| I used a piece of Evergreen styrene plastic as the base and glued each item of furniture on the base with superglue. |
 |
| The furniture had a very plastic dull look to them, I decided to give them a more realistic look by dry brushing with Vallejo model colour flat earth and off white followed by random streaks of Agrax Earthshade. |
 |
| Flocked with Woodland scenic earth blend and also added a few rocks with the flock. |
 |
| different views of the road block. |


 |
| BEF manning the road block on the outskirts of Dunkirk. |
 |
| FIRE WOOD FILE |
 |
| close up shot of the stacked pile of wood. |
 |
| Close up image of chopped wood ready for the fireplace, there is also a axe embedded on one of the blocks. |
 |
| A covering to keep the wood dry. |
 |
| First step in the construction is to visit the park and gather pieces of wood of similar diameter. |
 |
| Cut them into equal size pieces using a saw ( the saw I used is meant for metal cutting but I found that it gave a neat cut edge), these will be the pieces that will be used to create the stacked pile. |
 |
| Also cut up a few more smaller pieces of wood, these will be used to create the chopped pieces on the ground. |
 |
| Set up the wood without gluing them on a piece of plastic card and outline the base size needed with a pencil. |
 |
| Remove the wood and cut out the base with box cutters. |
 |
| Secure each of the wood pieces on the base with super glue. |
 |
| All the pieces glued in place. |
 |
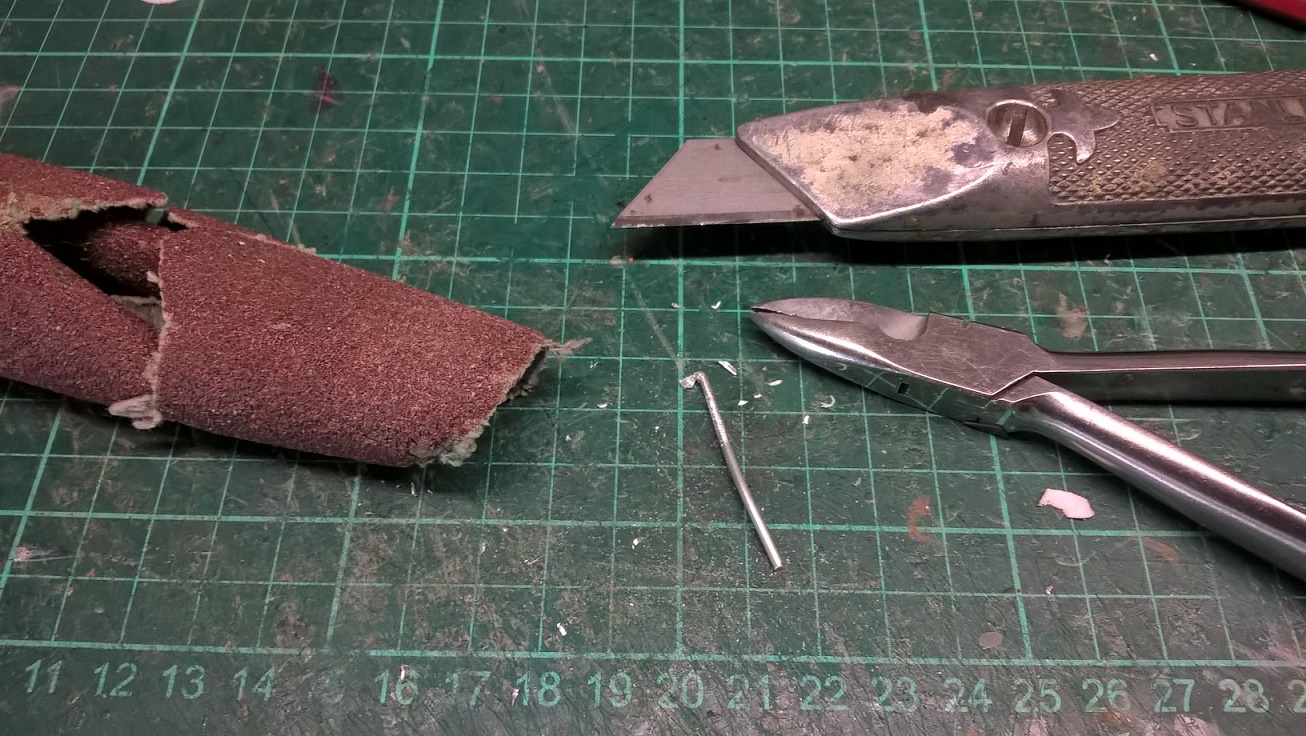
| The axe was constructed from wire, use pliers to squeeze together one end of the wire and flatten it. Next use the pliers to blend the portion that was flatten at right angle. Roughen up the surface of the wire with sandpaper and finally use the box cutters to trim of the excess wire to form a handle. |
 |
| Completed axe. |
 |
| Make a cut in the piece of wood and glue the axe in place. |
 |
| Now to make a cover cut a piece of cotton into a square. |
 |
| Soak it in PVA glue and mould it over the wood. |
 |
| Once the PVA glue is dry, fine tune the cover with the use of super glue. |
 |
| Once the super glue has dried, use green paint to paint the base and cover and flock the base with Woodland scenic earth blend. |
 |
| BEF Bren team on overwatch. |
 |
| LOG STACK |


 |
| Once again gather some wood pieces of roughly equal width. |
 |
| Trim them to equal lengths. |
 |
| Glue them onto a piece of plastic card with super glue. |
 |
| Once the longer pieces are glued in place,trim 4 short pieces of wood of the same diameter and punch them thru the base and glue in place. |
 |
| Cut out the base and chamfer the edges using box cutters. |
 |
| The 4 smaller pieces of wood embedded in the base seemed a bit to high so I trimmed them down as can be seen in the following image. |
 |
| Final step was to coat the base with some green paint and flock. The great thing about using real pieces of wood is that you don't need to paint them. |
 |
| More BEF troopers using the logs as cover. |
 |
| GRAIN SACKS. |
 |
| I picked up some of these items in a second hand store at the MOAB event. They are made from plaster, I also sculpted some of them using Milliput and based on Everygreen stryene sheets. |

 |
| The ones that have grain spilling out are ones I made. |
 |
| They were first coated with a black primer and dry brushed using Vallejo model colour German camo biege. Highlighting was done by adding increasing portions of VMC Iquai sand to the base and finally adding some stains on the bags using Agrax earthshade. The base was painted green and flocked. Cheers John |
Brilliant scatter John - well done.
ReplyDeleteThank you Furt
Deletecheers John
Woooooow! Awesome stuff sir!
ReplyDeleteThank you Michal
Deletecheers John
You're very talented John, inspired and excellent work all around, the chopped wood and the axe is a masterpiece...Thumbs up!!
ReplyDeleteThank you Phil
Deletecheers John
Very inspiring, thank you for showing, love the logs with axe, thought you printed it out at first, until I scrolled down, just wow
ReplyDeleteThank you Kgstanley81
Deletecheers John
Very effective scatter terrain and a great use of doll's house furniture.
ReplyDeleteThank you Steve
Deletecheers John
Gorgeous! I especially like the log pile and the fire wood pile. Need to make some myself. Could pull double duty as entrenchments as well.
ReplyDeletethank you Nick and looking forward to seeing you take on them.
Deletecheers John
Love the scatter terrain and wood piles. But I really love the road block made of furniture.
ReplyDeleteThank you commissarmoody
Deletecheers John
Wonderful stuff John. That roadblock is awesome!
ReplyDeleteCheers
Matt
Thank you Matt
Deletecheers JOhn
Love all of these John and some will definitely need to be 'borrowed'.
ReplyDeleteGood to hear Michael
Deletecheers John
Genius use of the dolls’ house stuff!
ReplyDeleteThank you docotrphalanx
Deletecheers John
One of the many reasons why your tables look so good John. I will be pinching.
ReplyDeleteCheers,
Pat.
My pleasure Pat
Deletecheers John
They look great as always. Your blog is a huge source of inspiration.
ReplyDeleteThank you Matias for your comments
Deletecheers John
Very nice indeed, thanks for always showing the "how to".
ReplyDeleteKym
Thank you Kym, my pleasure
Deletecheers John