Finally completed my revised What a Tanker Dashboard. Again like my WAT dice, this project was resurrected these Christmas holidays.
 |
| 10mm Crusader tank engaged in a desert tank battle with WAT rule set. |
 |
| The completed dashboard with my customised Command dice. |
 |
All the tokens removed.
|
 |
The measurements for the dashboard are 10.5cm x 14.5cm. The dials note the Armour and Strike value. Two dice have been placed in the Damage dice area. |
 |
Circular marker removed revealing the consequence of a first Permanent Damage Hit on the Turret.
Each time other Permanent damage Hit occur on the Turret, the next marker is removed and so forth. |
 |
| For effects of Permanent Damage Hits on the Hull the same principles apply by removing the left circular marker and moving to the right as more Hull Permanent damage hits occur. |
 |
| The underside of the circular markers have tiny earth magnet secured in place with superglue. |
 |
I aimed to incorporate the Tokens sold by TooFatLardies for WAT in my Dashboard. The Buttoned, Acquired, Aim and Loaded tokens can slide from left to right to indicate its status. The tokens have a small earth magnet inserted and adhere to the backing of the dashboard which is made of metal. |
 |
| Underside of the tokens with tiny earth magnets, I first used my handpiece motor to create a cavity, placed the magnet in the hole and secured it in place with super glue so that it is flush with the base of the token. |
 |
| As a side note here are 2 images of the first Prototype I started soon after WAT rulebook was released and as with the customized Dice mentioned in my last post I put it on the backburner. |
 |
| I decided to use plastic card as the basis for the dashboard as its strong, ridged and easy to cut. |
 |
First step, working out the dimensions of the dashboard, this was done by placing all the dice and tokens on a piece of paper and marking the allocated space each item needed with a pencil. Thus the first frame was made and used as a master. |
 |
| First step is to transfer the master onto the sheet using a pencil. |
 |
| Using box cutters and a metal ruler to start the cutting process. |
 |
| All the necessary pieces have been removed. |
 |
| 8 dashboard ready for the next step. |
 |
| To remember the order of turns I numbered a couple of MDF bases. |
 |
| I also drilled a hole in the middle of them. |
 |
| To secure the Turn counter onto the dashboard, I used shafts I had previous cut off from small nails which will be explained later in the post. |
 |
| I positioned the Turn counter on the framework and used a small hammer to punch thru the plastic card. |
 |
| A hole has been created, next step is to cut the nail shaft to the desired depth (seen to the bottom right of the counter) using a pair of pliers |
 |
| Glued in place with superglue. |
 |
| Image shows the post just poking out above the counter. |
 |
Now onto constructing the dials for the strike and armour value of the vehicle.
First step was to make a template with numerals from 1 to 12, I used PAINT program on my computer to do this.
I mark out the area that needs to be visible on the dial using a red marker. |
 |
| Since I have a large number of Warlord games plastic bases lying around, I decided they would make for a good dial, first step was to transfer the marks from the template to the plastic base. |
 |
| Using the red marker, a clear outline is marked on the plastic base. |
 |
| This is cut out with box cutters. |
 |
| I hobby file is used to chamfer the edges and make a neat circular cut. |
 |
| Check with the paper template that all the numbers can be clearly seen, small adjustments can be make with a hobby knife. |
 |
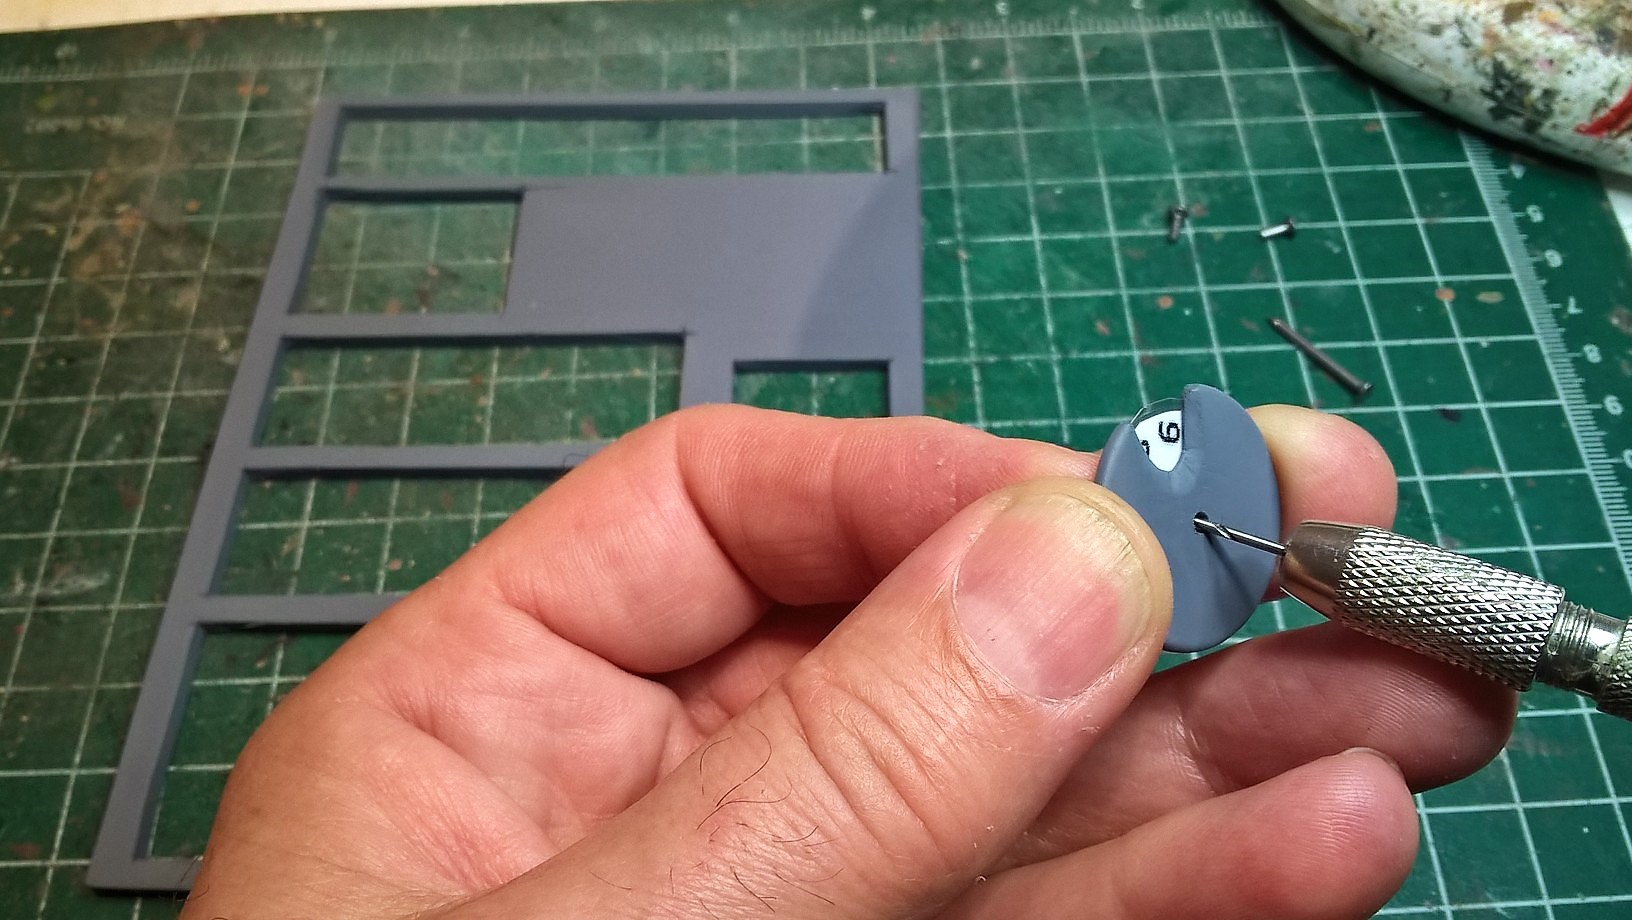
| Prep a template base with the center drilled out, this will be used to mark out the center of all the plastic dials. |
 |
| Place a plastic base under the template base and using a hobby drill make a hole. |
 |
| This will be the pilot hole to be used as a guide to further enlarge the hole. |
 |
| All the dials are now ready for the next stage. |
 |
| A hobby handpiece or hobby drill is used to enlarge the holes to suit the diameter of the small nails. |
 |
| Check to see if the nail fits thru the hole and is a tight fit, you don't want the dial too loose. |
 |
| Line up the dial with the nail on top of the dashboard and mark out the area that needs to be cut off. |
 |
| Use the cutting edge on a pair of pliers make the necessary adjustment to the nails. |
 |
| Coated all the pieces of the dashboard with Rustoleum Grey primer and then sealed the surface with Testors spray lacquer. |
 |
| Cut them out and placed them in a plastic sleeve ready for laminating. |
 |
| Used my cheap Laminator from Office works to laminate them. |
 |
| Cut out the individual items. |
 |
Assembling the dials.
|
 |
First step is to position the laminated dial on the back of the plastic dial and note that it is evenly distributed as can be seen on the bottom of the image.
|
 |
| Secure the laminated dial to the plastic base in your hands and use a hobby drill to create a hole thru the laminated surface, this will be your pilot hole for the next step. |
 |
| Position the laminated dials on the dashboard and use the same nail to carefully punch a hole thru the plastic card. |
 |
| Nice clean hole. |
 |
| Check the underside of the dashboard to make sure the nail has gone right thru. |
 |
| Use the same nail as a guide to hold the dial in place while applying super glue to the underside of the dial and using the nail point to correctly position the laminated dial on the surface of the dashboard. |
 |
| Image shows the first laminated dial set in place with super glue, repeat the process to secure the other dial. |
 |
| Use a hobby knife to slightly enlarge the hole just a bit on the top surface, this is done to make it easier for the super to flow down into the hole as can be seen in the next image. |
 |
Turn the dashboard over, check to see if any super is on the surface of the laminated dial, if so wipe it off, the place the trimmed nail into the plastic base and position it in the hole and drive the shorten nail into the hole with a hammer.
Wait a couple of seconds for the superglue to set then check to see if the dial can be moved and that the nail head does not move. |
 |
| Repeat the process for the other dial. |
 |
| Next step is to cut out the lables. |
 |
| You can secure them with super glue or try using Tamiya Clear Varnish to secure them in position (if you use a varnish place a layer down first then place the label and coat it with another layer). |
 |
| Time to position the Permanent damage table. |
 |
| Flip the dashboard over place a layer of superglue around the area that the table with occupy, flip it over again and carefully place the table so that it can be clearly seen. |
 |
| I also used the off cuts from the laminated sheets to place over the 4 spaces which will be occupied by the TooFatLardy token,these where secured with superglue. |
 |
| Using a pencil I marked out the dimensions of the dashboard on a metal sheet. |
 |
| Used tin snips to cut out the plate. |
 |
| Super glue was applied to the areas marked in yellow highlight on the underside of the dashboard. |
 |
| And secured in place. |
 |
| I also made up a system of recording type of vehicle used and characteristics. |
 |
| To seal the labels I first applied a layer of vanish, placed the label on the vanish then coated the top with another layer. |
 |
| Made 2 sets of labels ones on the left for beginners and the ones on the right for the more experience players. |
 |
| You can also just use a non permanent marker to note the vehicle and any characteristics it has on the metal surface. Just noticed I wrongly spelled Acquired on the lablels, have to correct that 😕 |
 |
My 8 dashboards ready with the exception of the last 2 having the TooFatLardies WAT tokens missing, have to order another set to make up the numbers.
I encourage you to give it a go and make one for yourself for private use. |
CHEERS JOHN


I've never played the game but this looks a very neat solution to track the effects of the game upon the tank etc. Always nice when you make stuff like this yourself:)
ReplyDeleteThank you Steve for your comments
Deletecheers John
Nice work John! After your dice last time I was wondering if you'd also make your own dashboard. And here you are.
ReplyDeleteYes thanks Nick can't have new command dice with without a new dashboard
Deletecheers John
Pretty dang cool.
ReplyDeleteThank you Commissarmoody
Deletecheers John
Superb work John, you need to go into mass production.
ReplyDeleteThank you Pat, I did get my CoC dashboard mass produced by Warbases, I might approach one of the MDF companies.
Deletecheers John
Brilliant! Always enjoy these sort of dashboards, and this is an excellent example.
ReplyDeleteThank you lasgunpacker for your comments
Deletecheers John